
What you can do here
Translation settings decide how the AI translates your products. Set them once, and every AI translation in your project follows the same rules. You stay in control of tone, terminology, and which fields get translated. Where to find it: open your avatar menu → My Settings, then AI & Content → Translation in the settings sidebar.These settings apply to all AI translations, including bulk translations from Translating Products. Changes affect future translations only. Content you already translated stays as it is.
General
Set the default mode, tone, and content handling for the whole project.
Fields
Add rules for a single field, like a character limit on the product name.
Languages
Override the tone or formality for one language.
Categories
Use different terminology for a group of products.
Dictionary
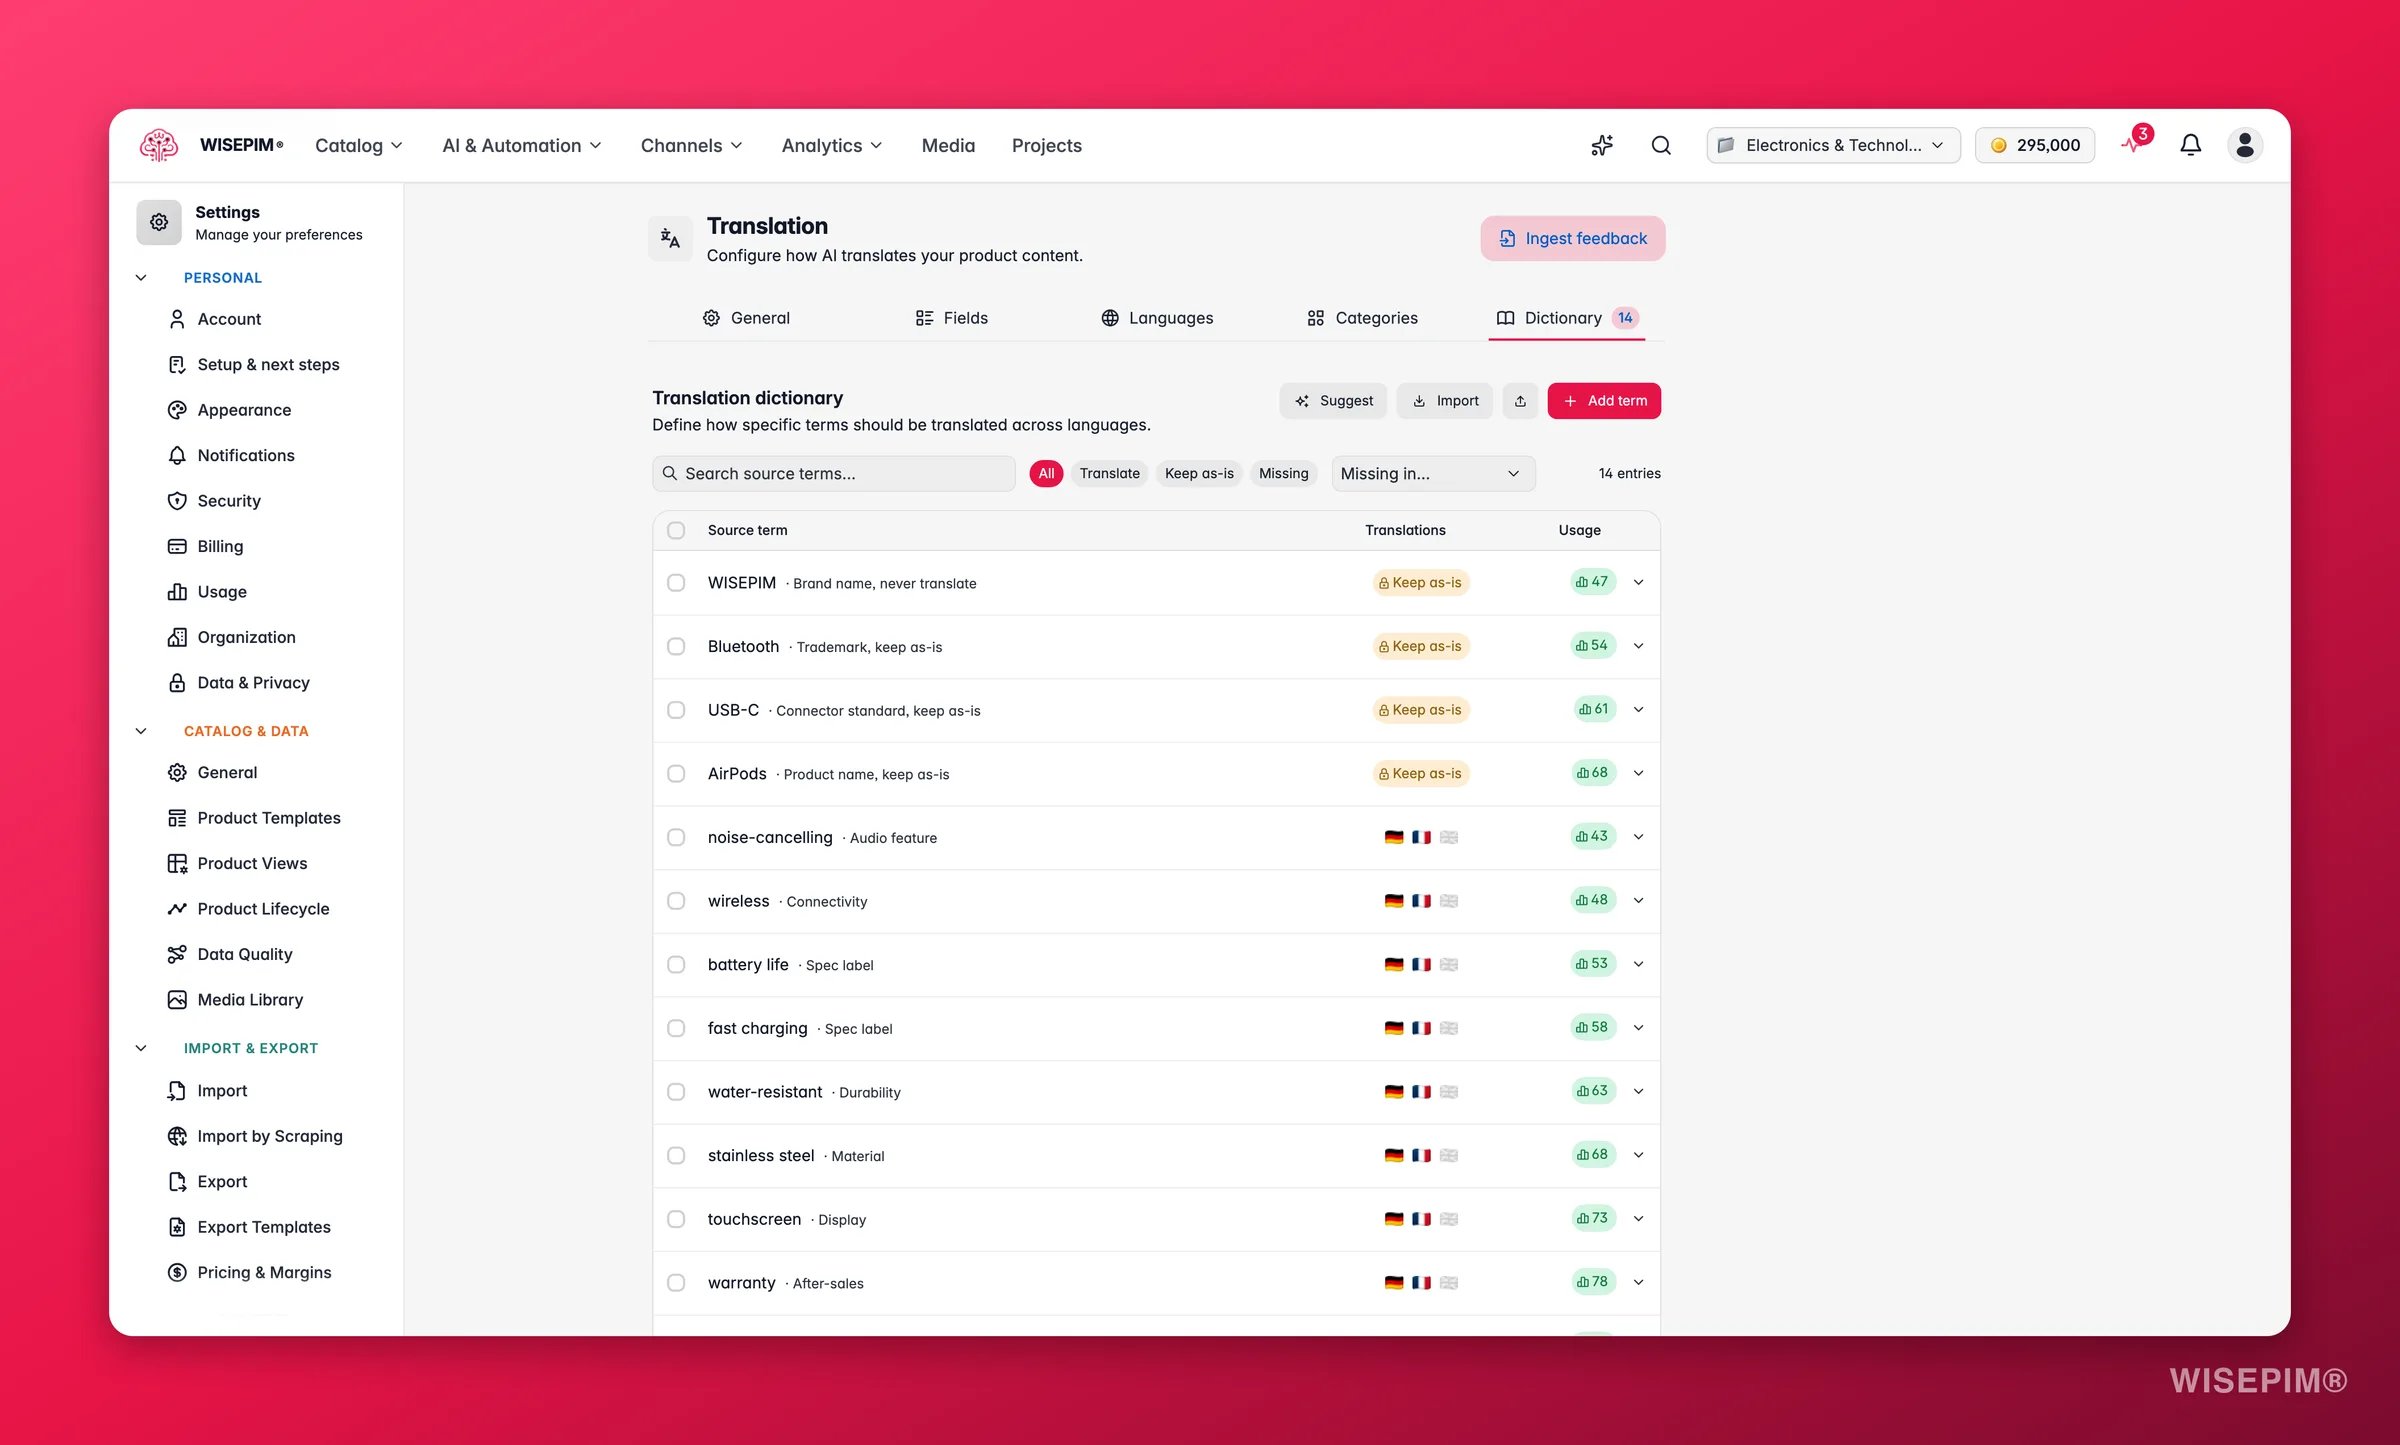
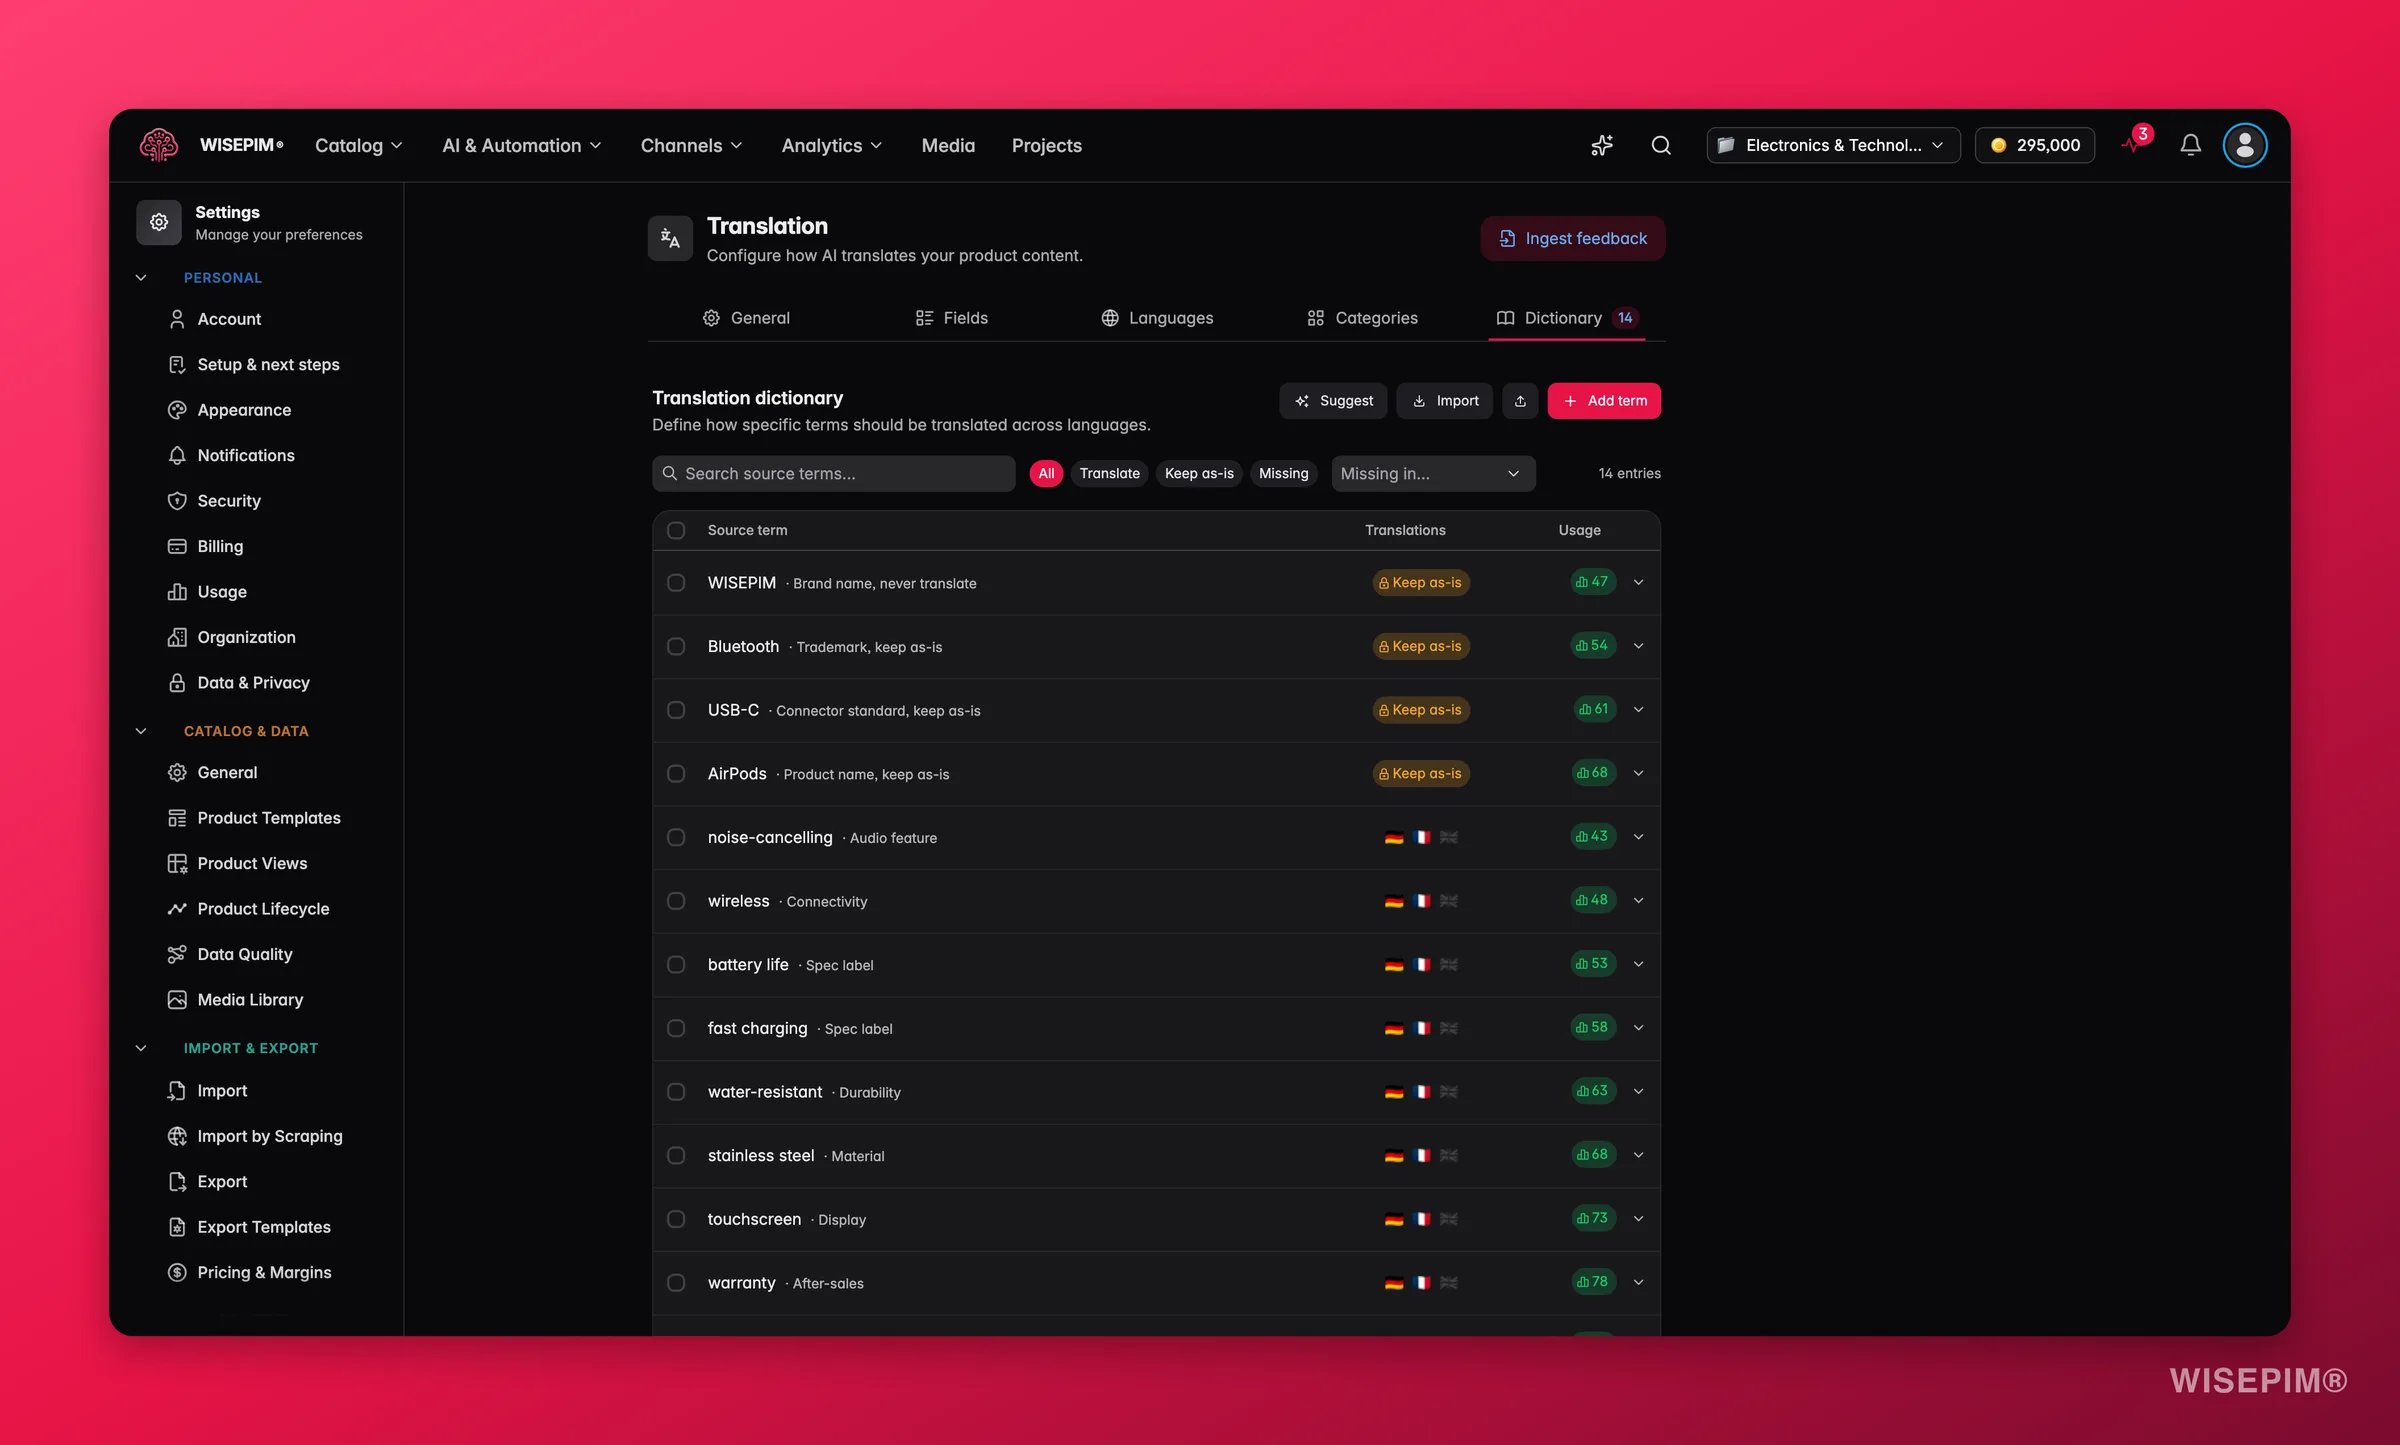
Lock in how specific terms translate across every language.
General
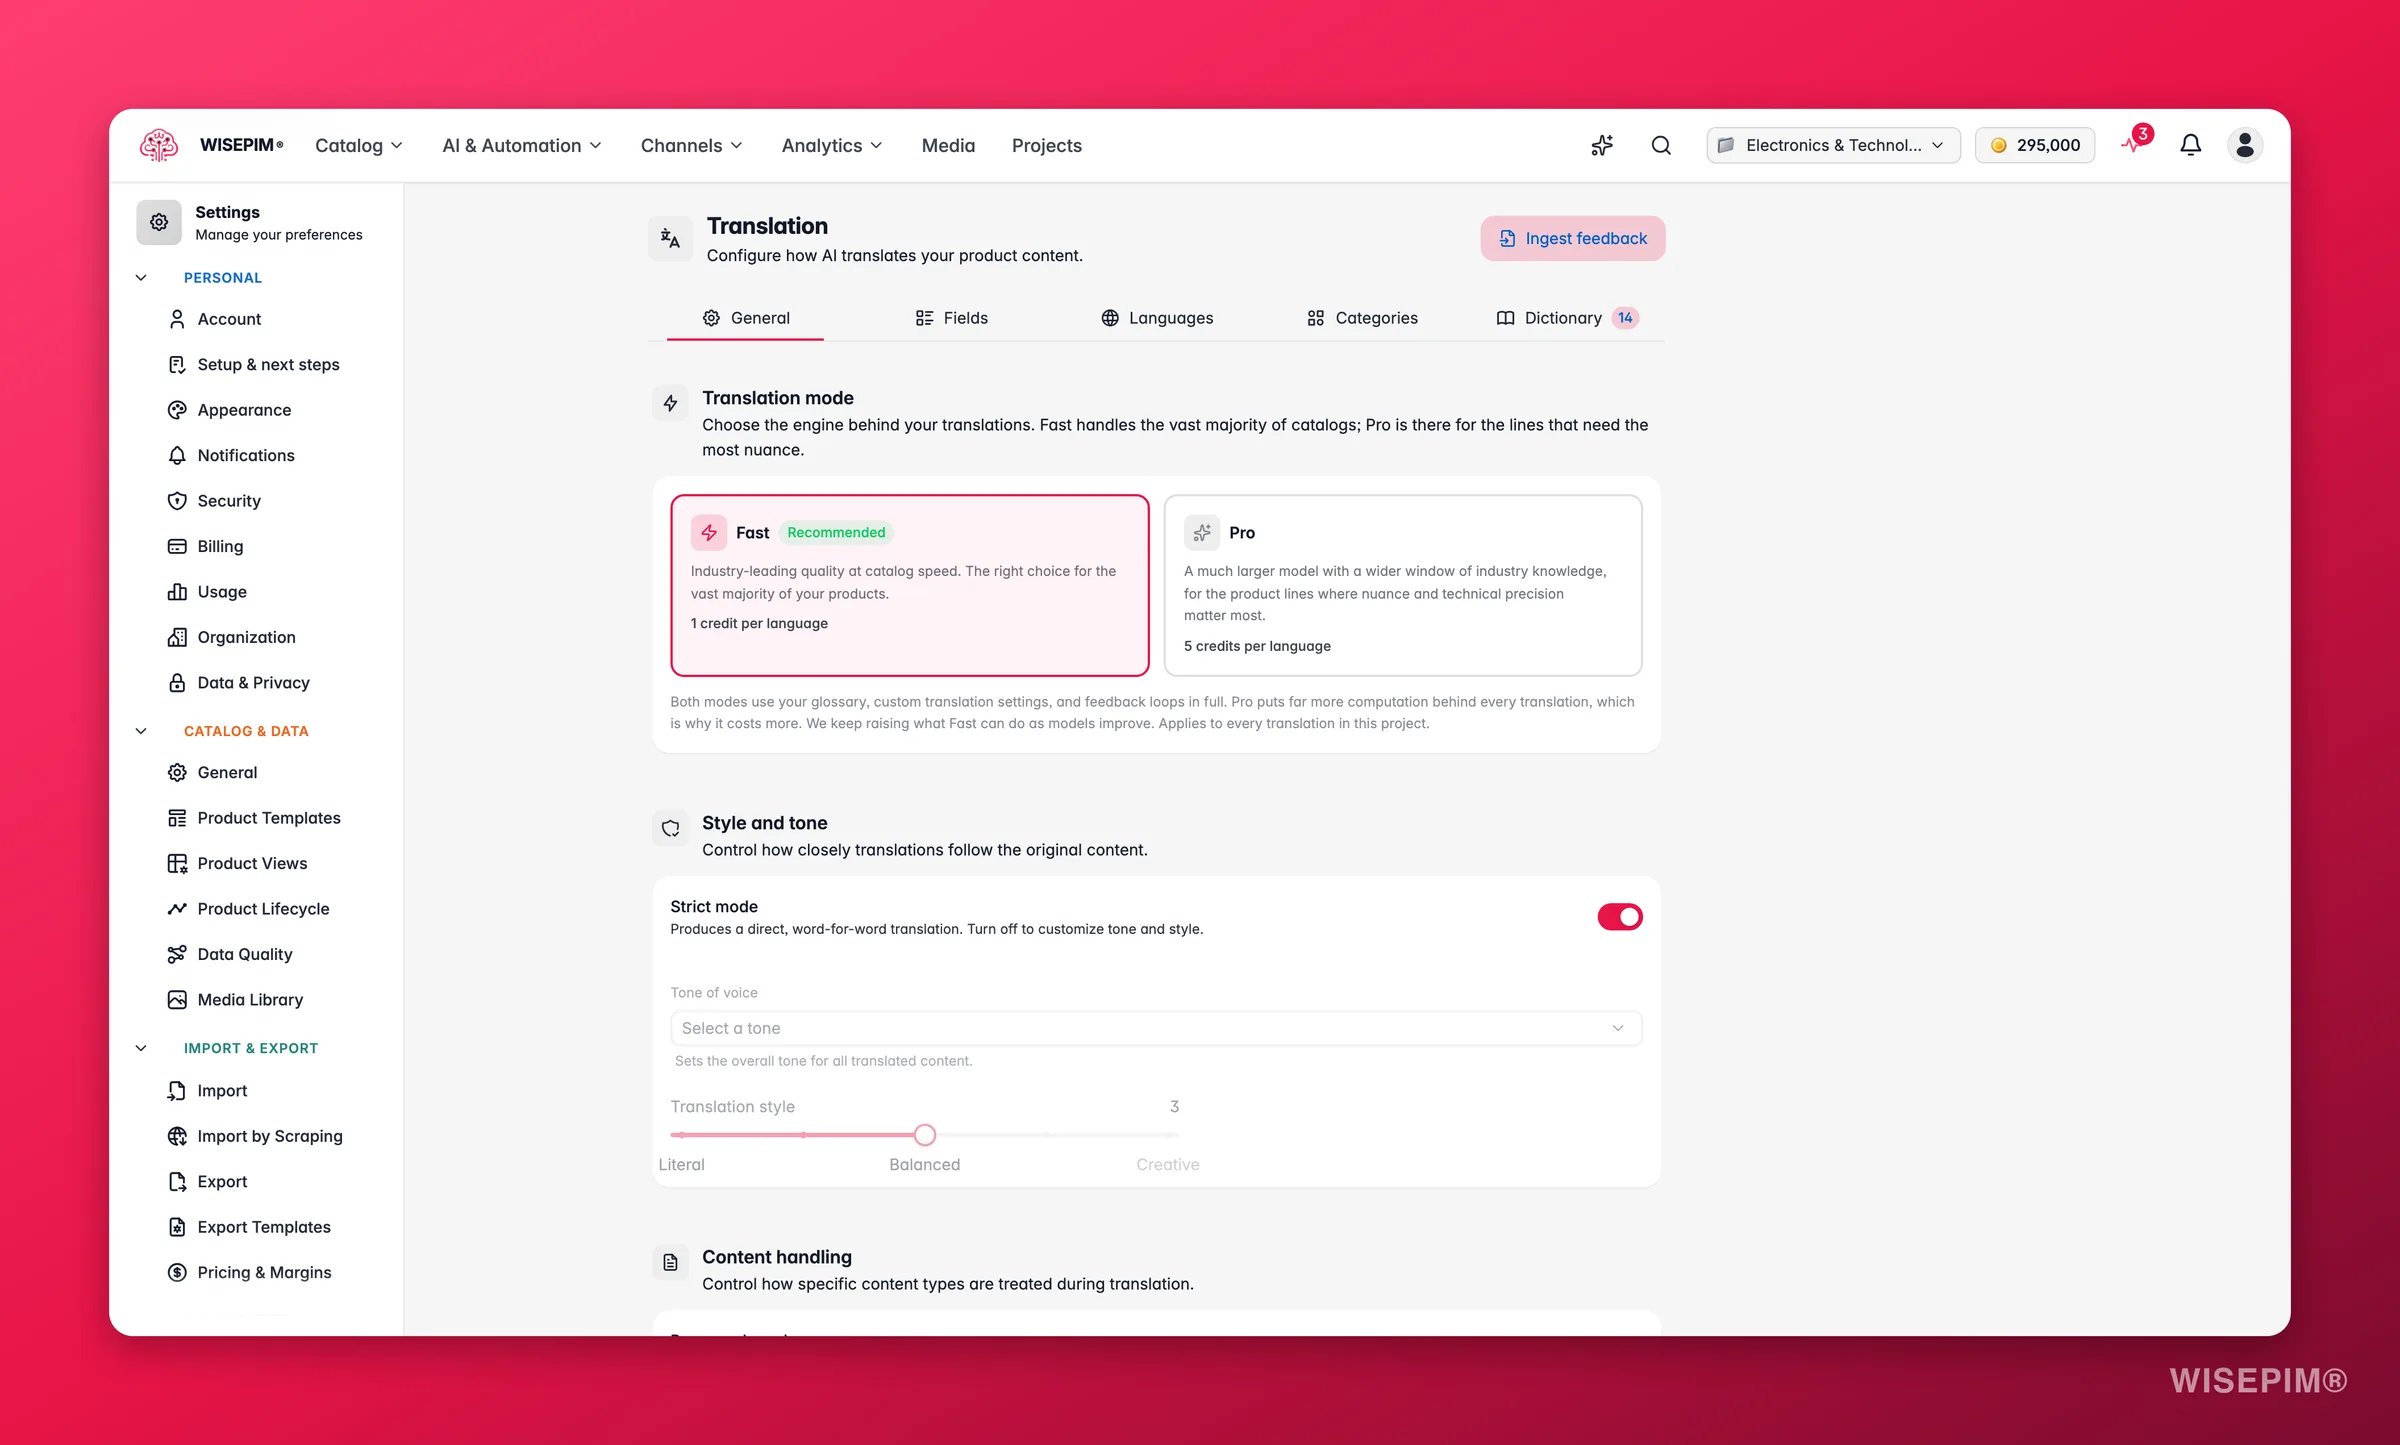
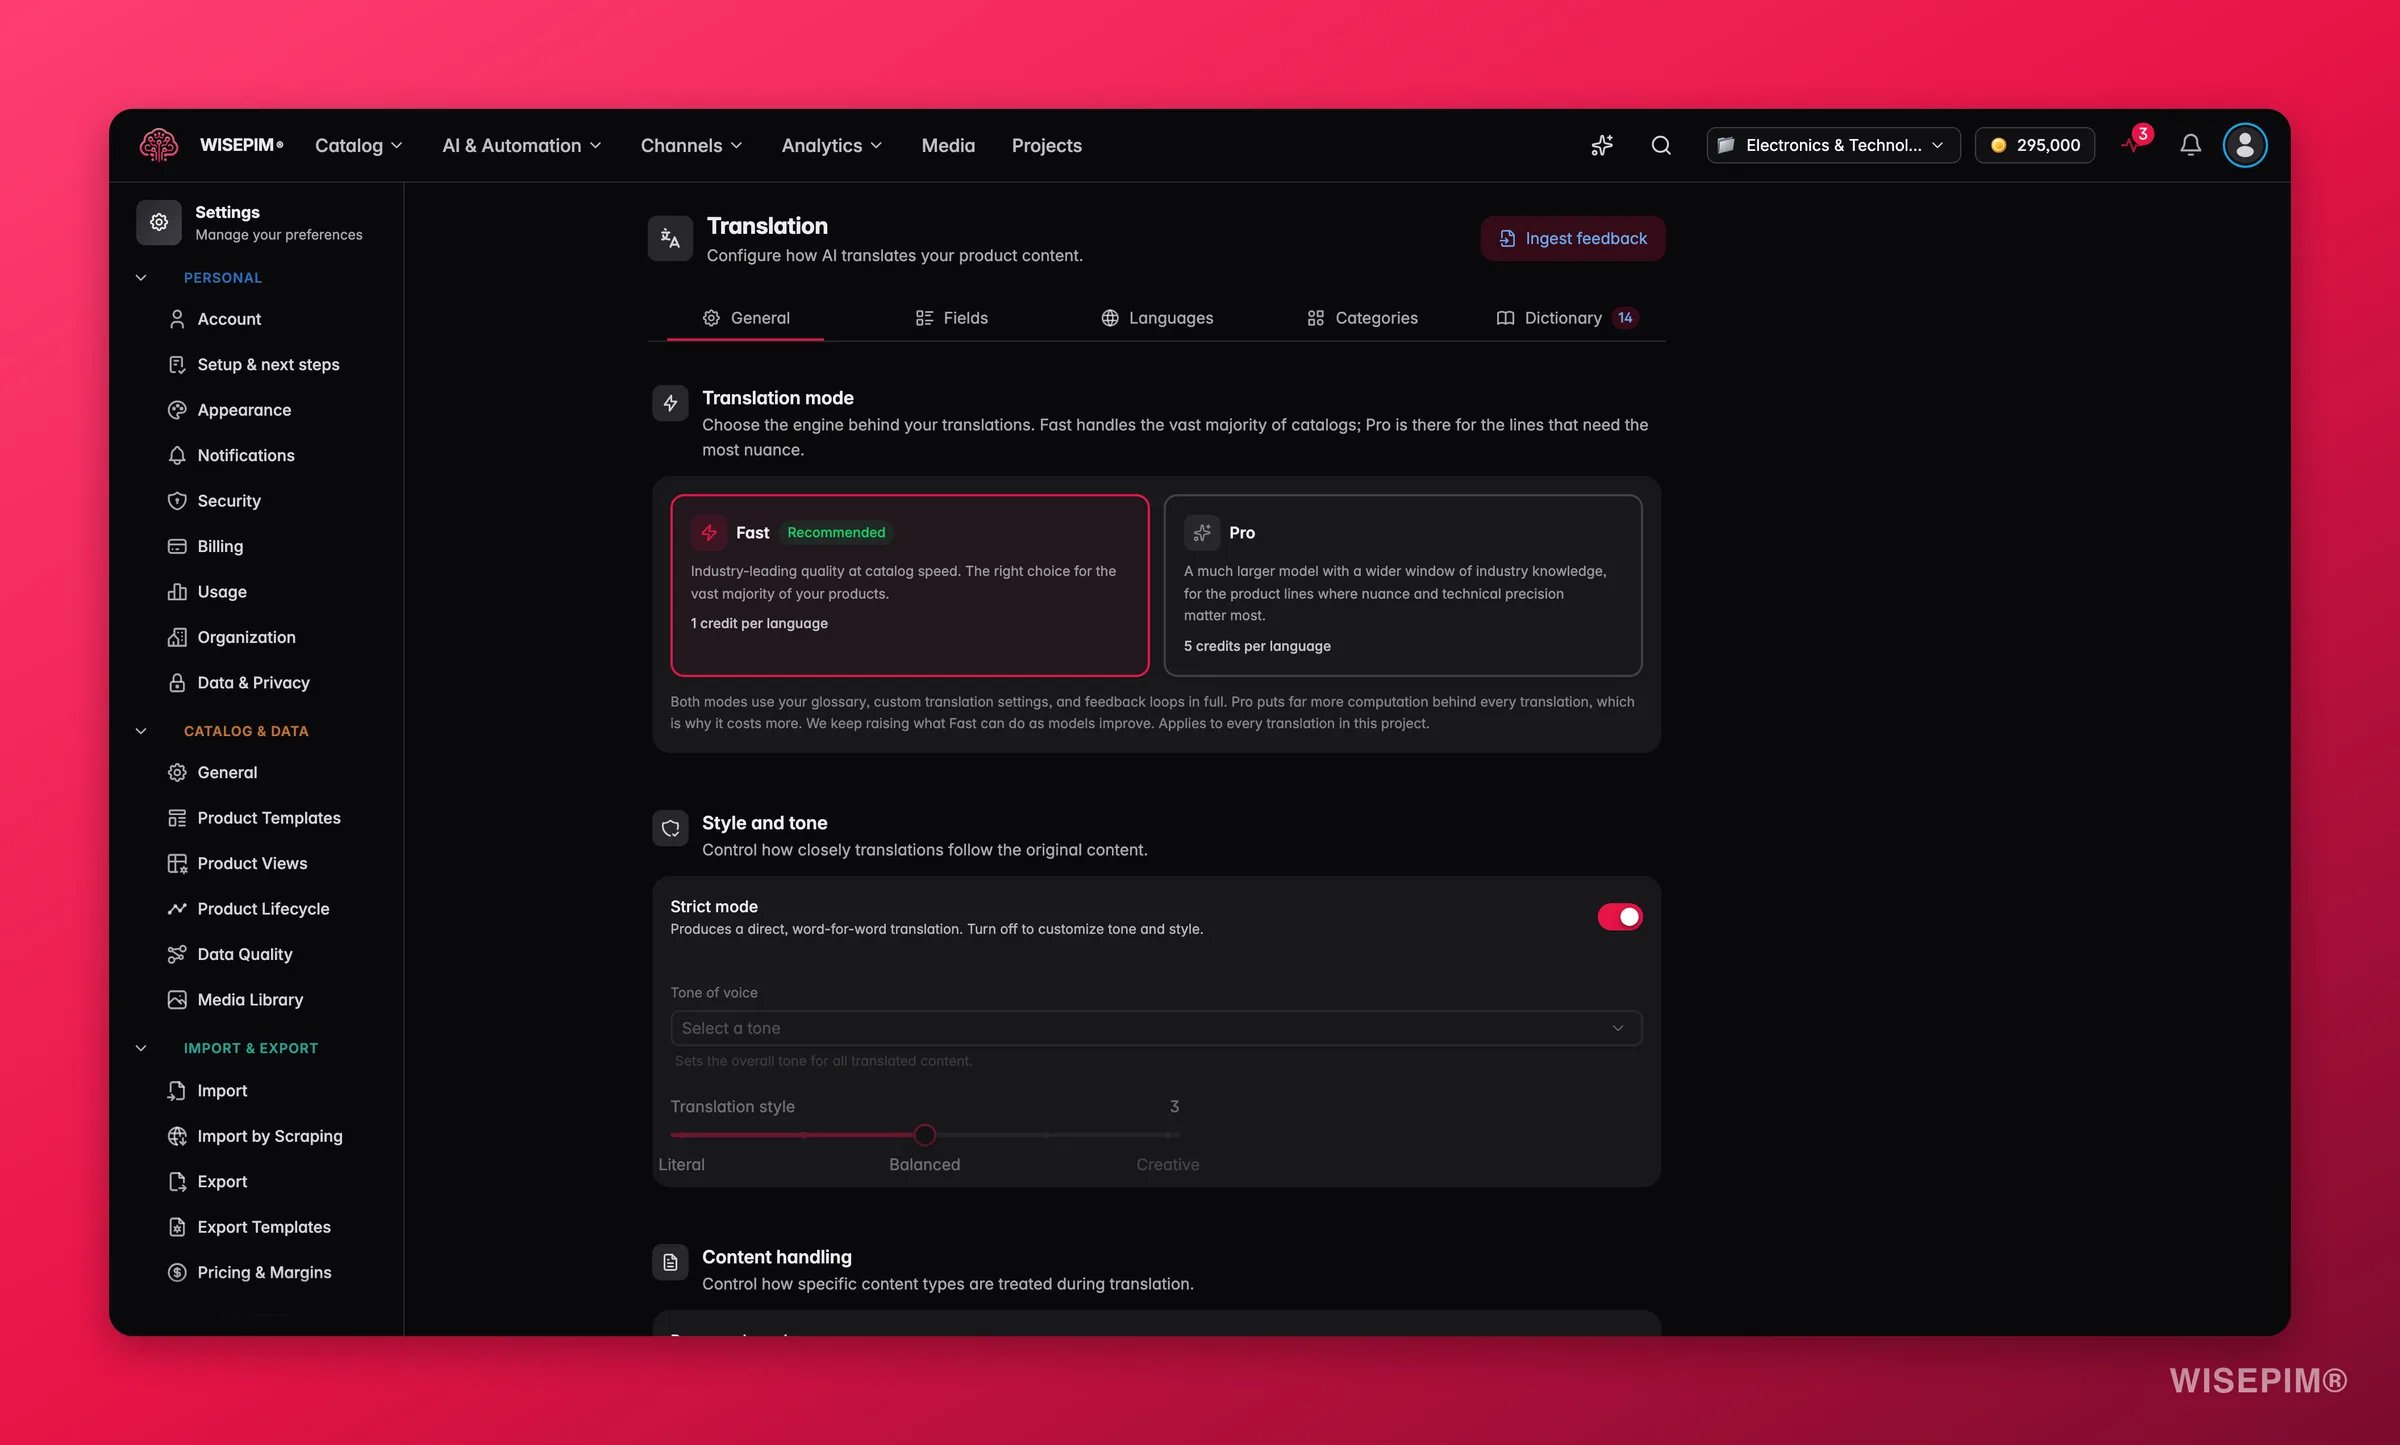
Choose Fast or Pro
Every translation runs in one of two modes. Set the default here, and pick a different one per run when you need to.Fast is on by default. Start there, translate your catalog, then re-run Pro on the products where the wording really matters. Failed translations are refunded automatically.
Tone and style
Content handling
Decide how the AI treats specific content during translation.- Preserve brand names: keeps brand names, model numbers, and proper nouns untranslated. On by default.
- Preserve formatting: keeps HTML, markdown, lists, and tables intact. On by default.
- SEO optimization: optimizes translated meta fields for search in the target language. Off by default.
- Unit handling: choose how measurements convert.
Additional instructions
A free-text field for custom rules that apply to every translation. Use it for project-wide notes like “Always use formal language” or “Never abbreviate product names.”Consistency you get for free
Some things you do not have to configure. They apply to every translation, in both modes.- Translation memory: once a phrase is translated one way, it stays that way. The same wording comes out the same across products, across chunks of a big run, and across runs you start weeks apart.
- Built-in style guides: WISEPIM ships language rules for 24 locales, covering things like formality conventions and local typography. You get them without writing a single instruction.
- Regional languages are treated as their own: pairs like
nlandnl-BE, or German variants, are translated and stored separately. A Belgian Dutch translation is no longer mistaken for a copy of the Dutch one.
Fields
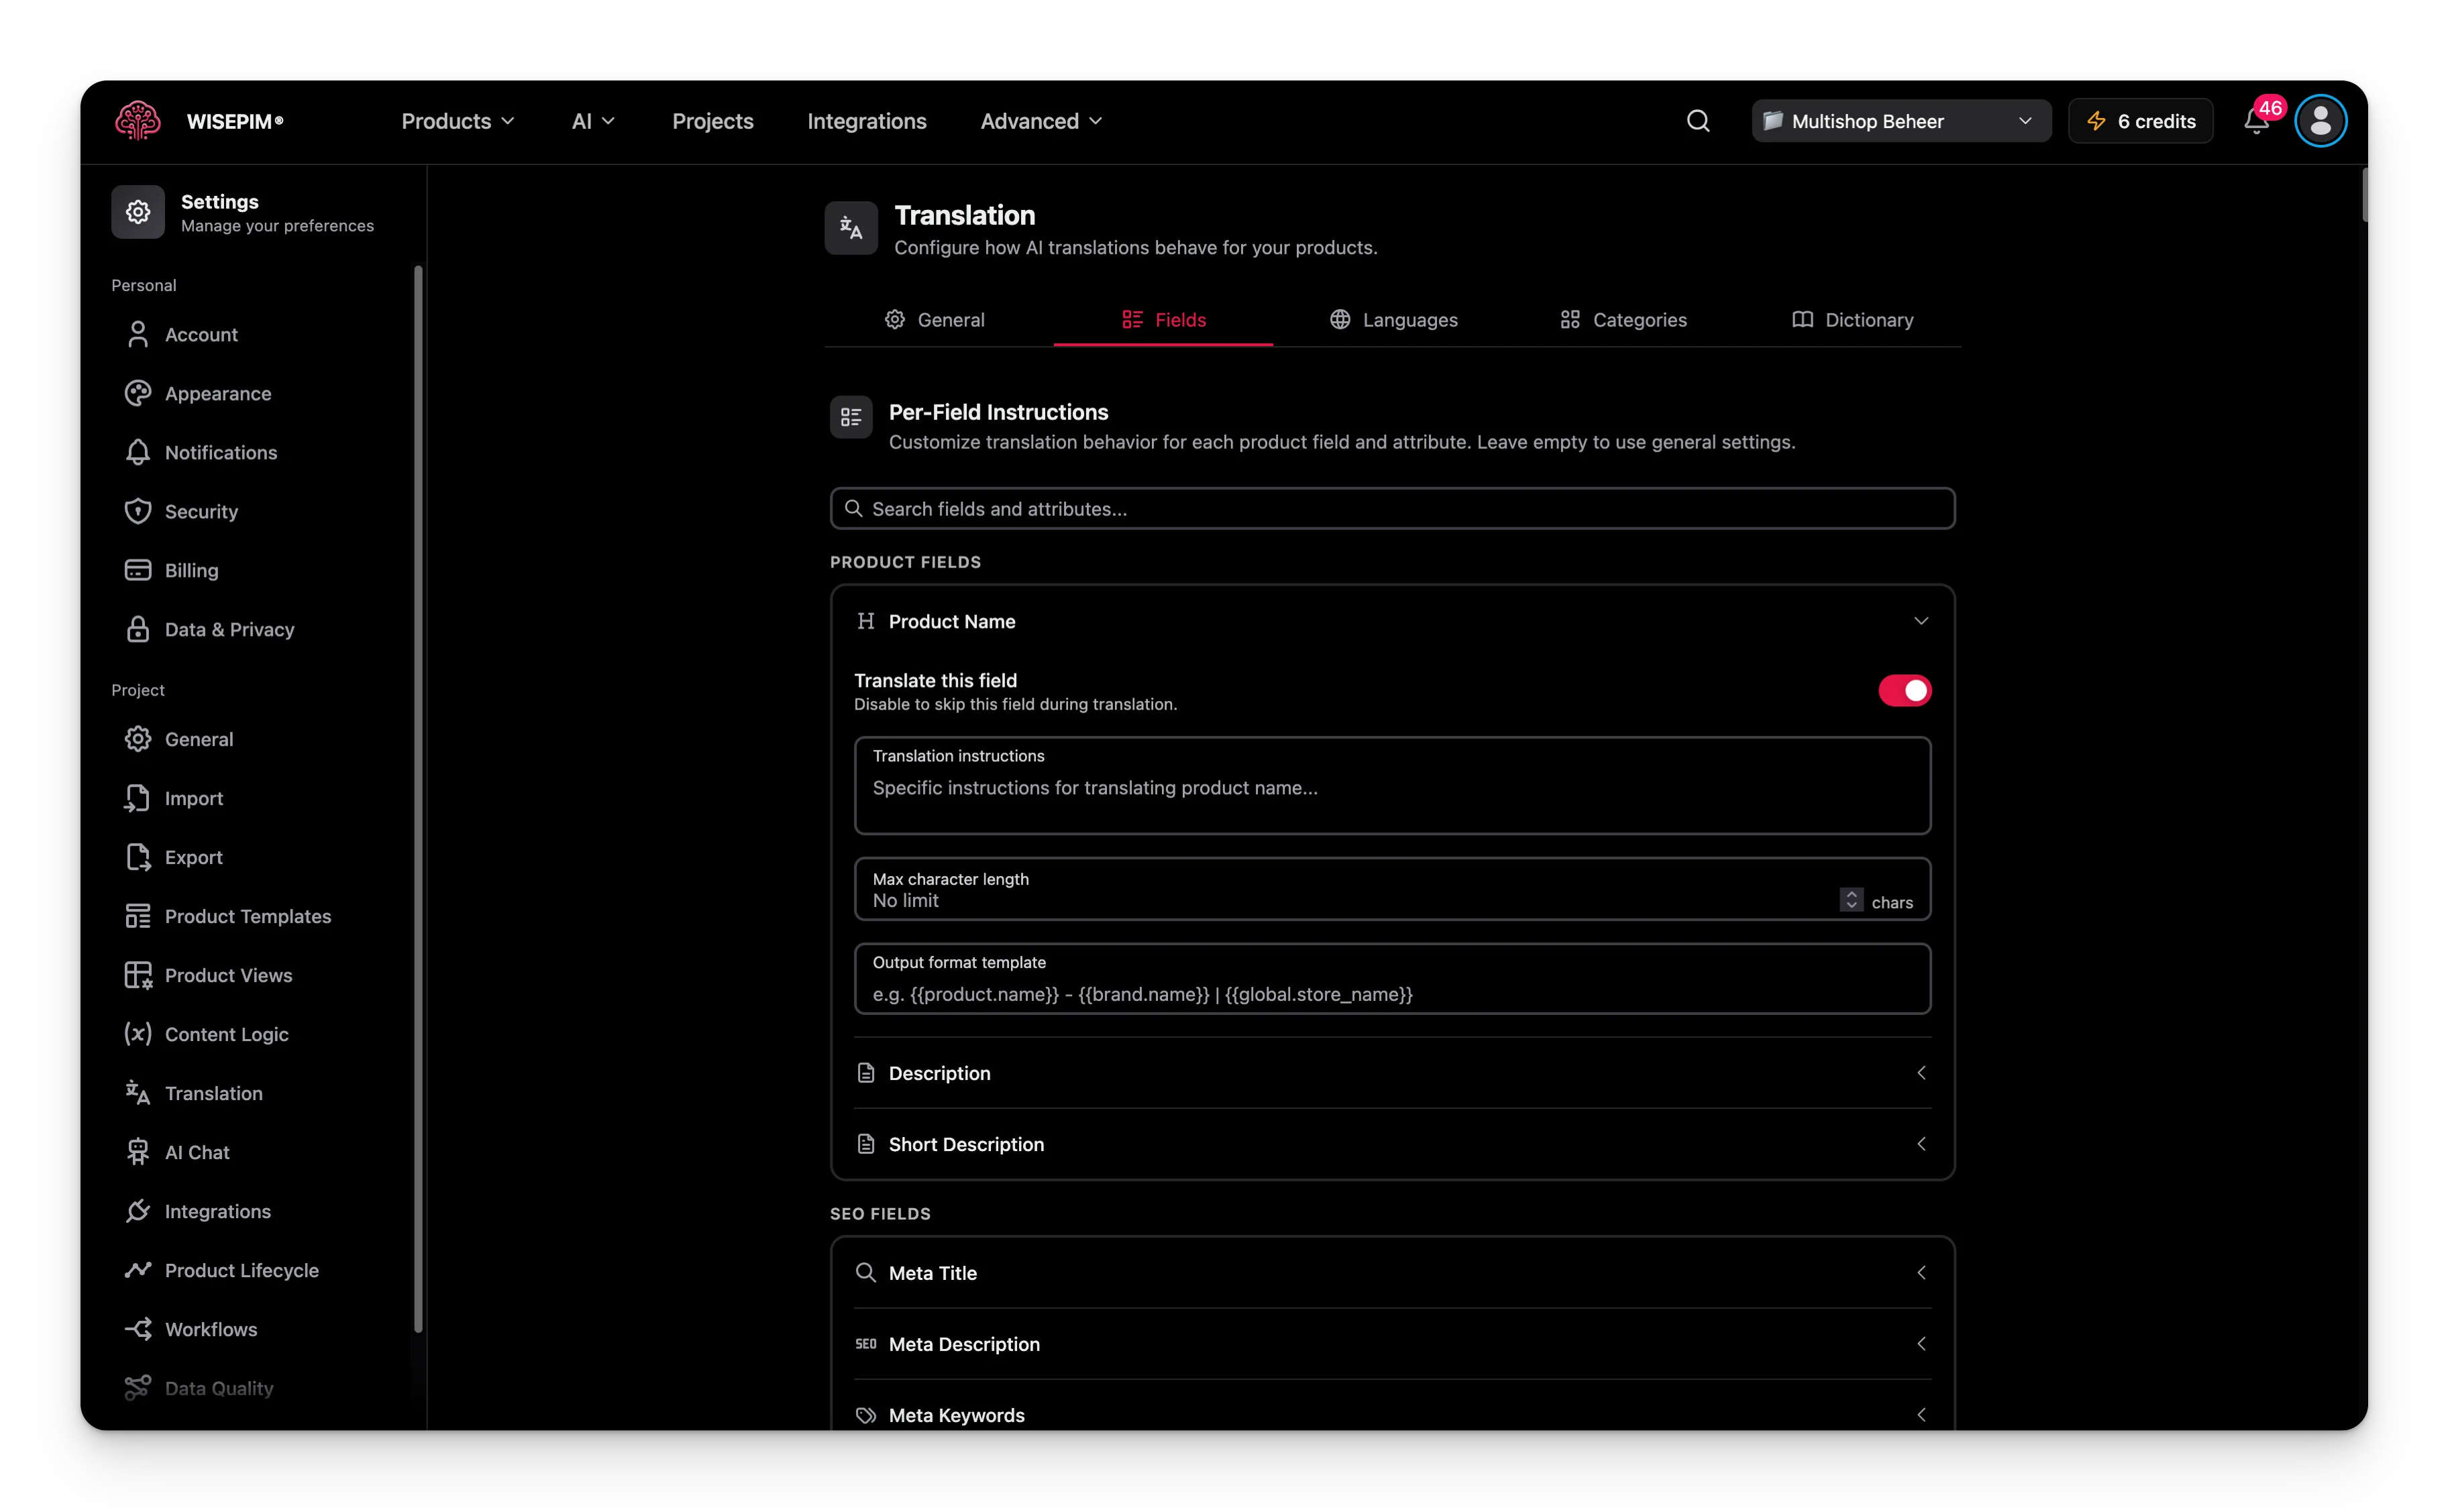
- Product Name
- Description
- Short Description
- Meta Title (SEO)
- Meta Description (SEO)
- Meta Keywords (SEO)
Set rules for one field
Expand any field to configure these options:- Translate this field: turn translation on or off for this field. Useful for fields you want to skip, like SKU-based names.
- Translation instructions: rules that apply to this field only, such as “Keep the product name under 60 characters.”
- Max character length: limit the length of the translated output. Leave empty for no limit.
- Output format template: build the output from variables.
For example, a template of
{{product.name}} | {{brand.name}} produces “Wireless Headphones | SoundMax” in the output.
Languages
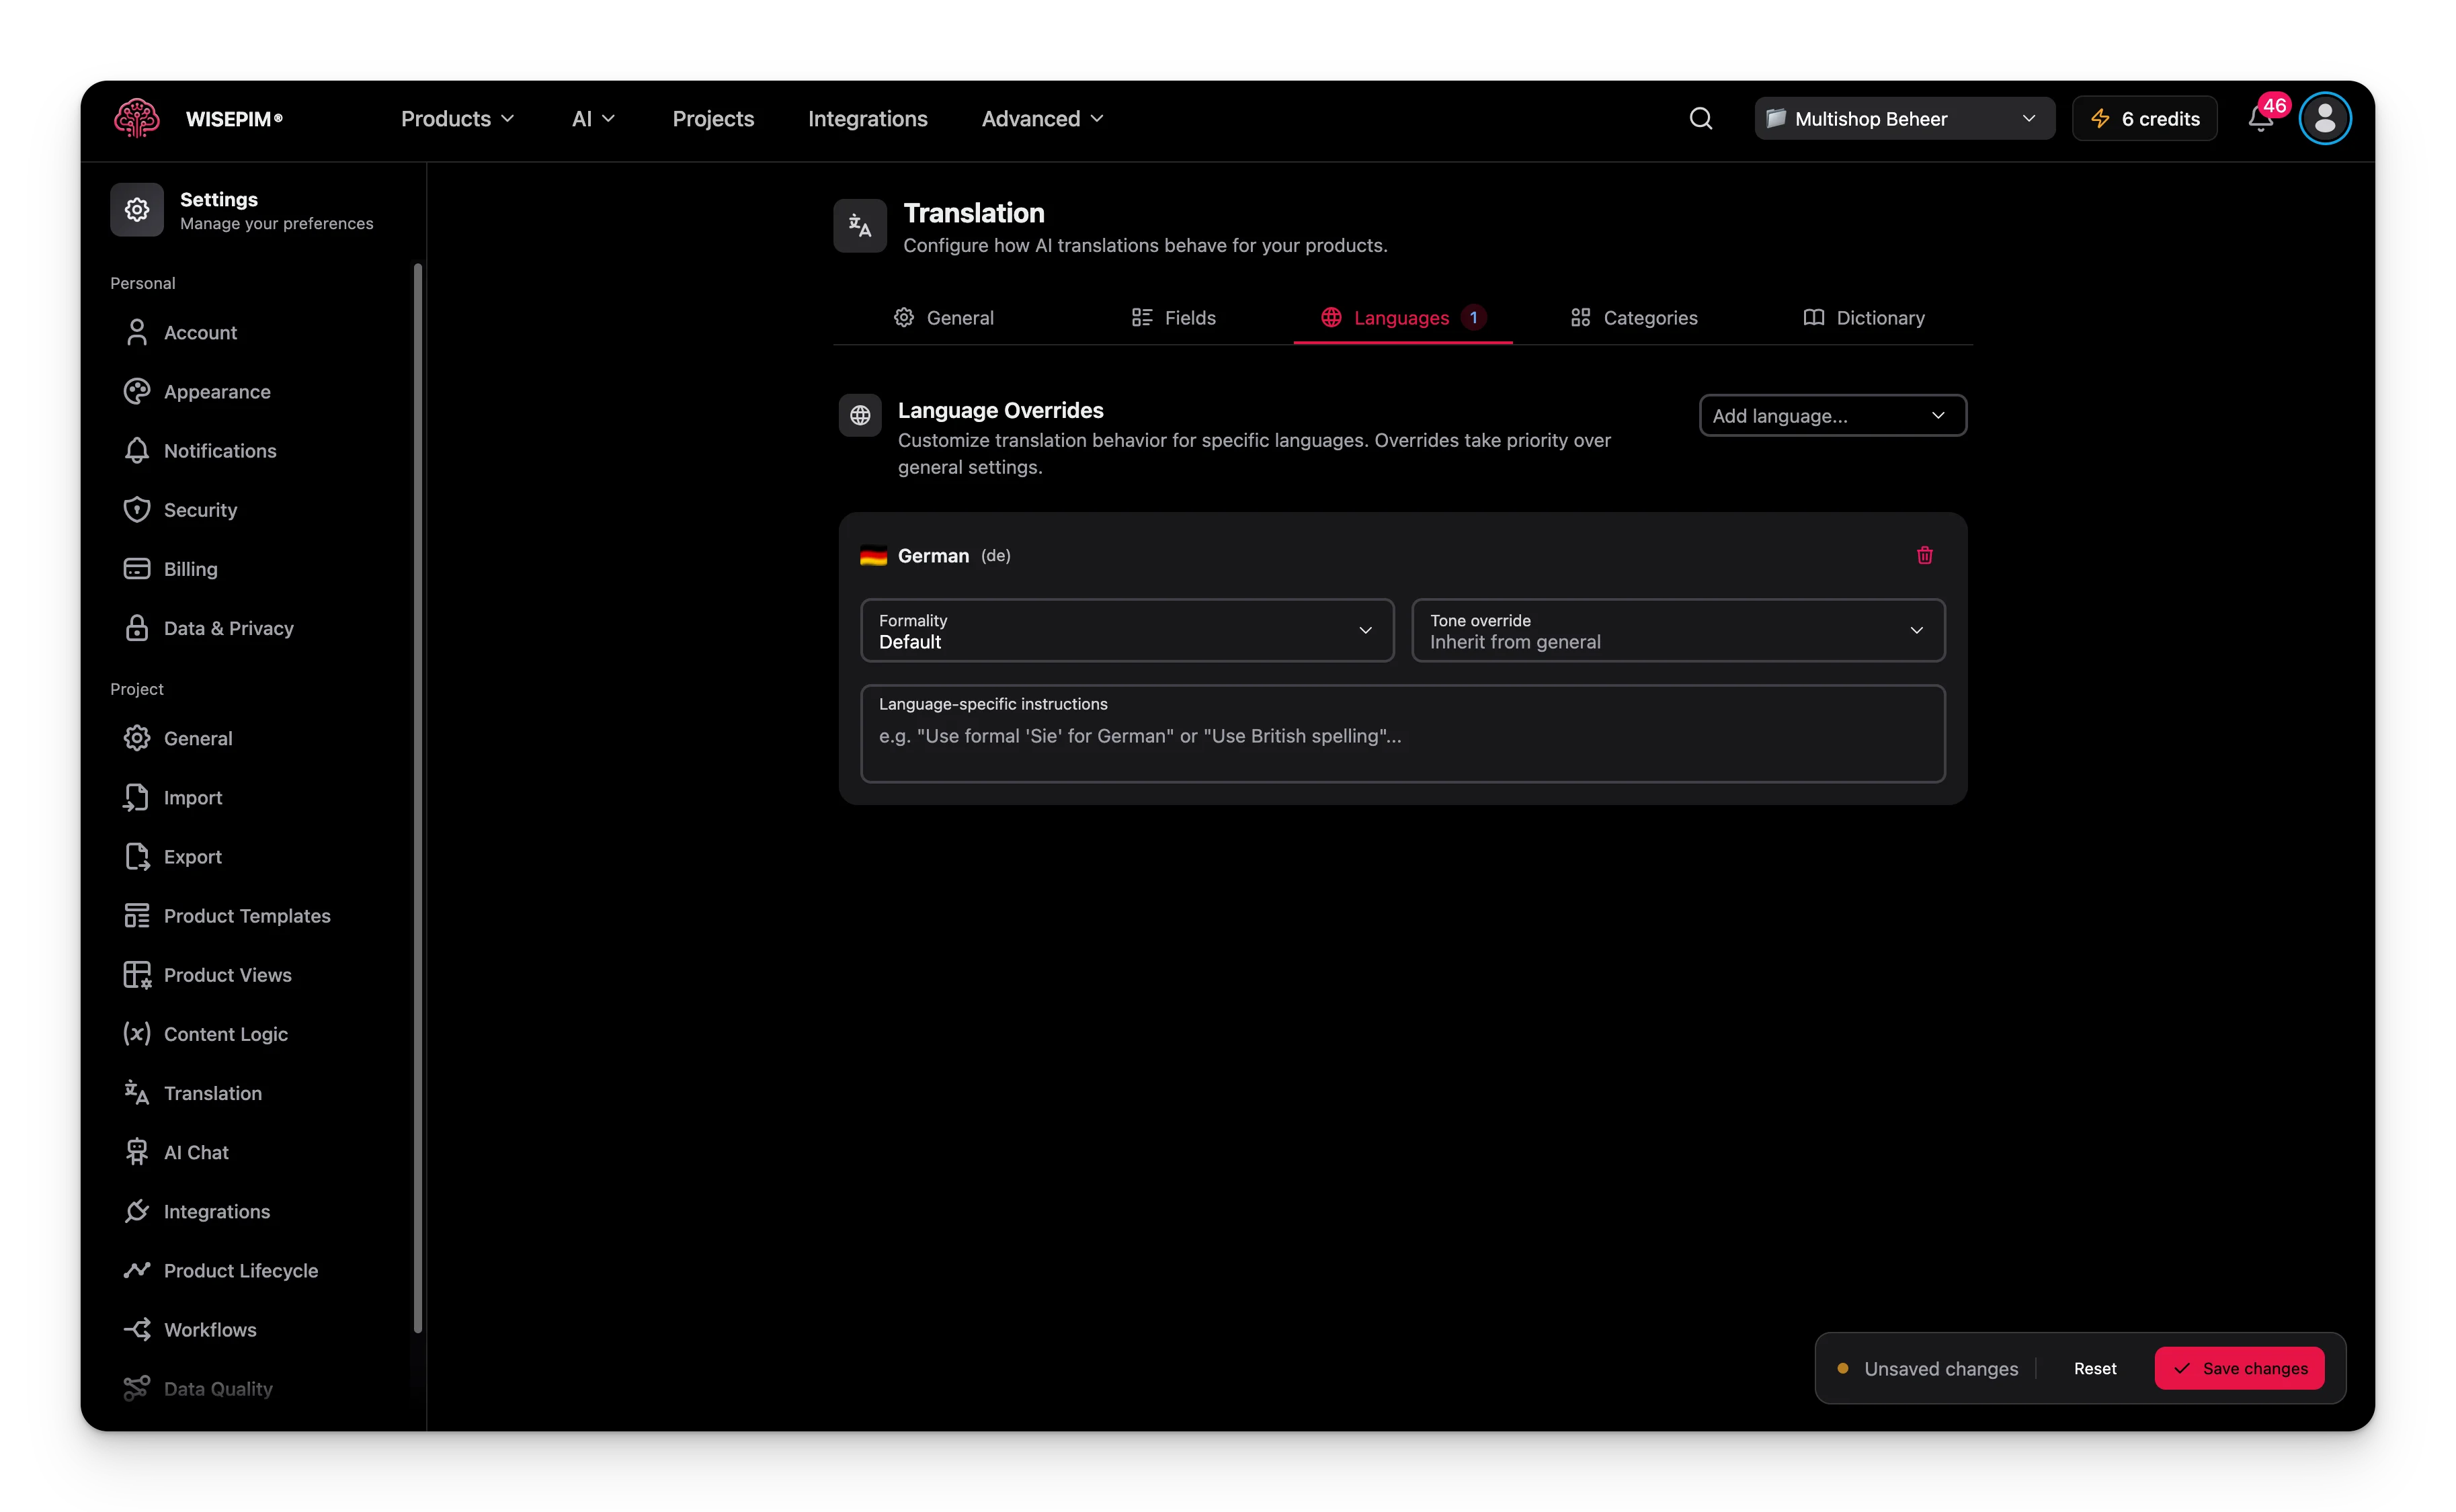
- Formality: choose Default, Formal, Informal, or Neutral. This helps with languages that have a formal and informal form, like “Sie” and “du” in German.
- Tone override: set a different tone for this language. Choose “Inherit from general” to keep the project tone.
- Language-specific instructions: rules for this language only, such as “Use British spelling for English.”
You can add one override per locale in your project.
Categories
Use the Categories tab when a group of products needs its own terminology or style. For example, electronics may need technical terms while children’s products need a playful tone. Click Add category and pick categories from your catalog tree. For each one you can set:- Translation instructions: rules for this category, such as “Use technical terminology for electronics.”
- Terminology notes: preferred terms, glossary notes, and naming conventions for this category.
Dictionary
Add a term
1
Click + Add term
A new entry appears.
2
Enter the source term
Type the original term in your primary language.
3
Add a translation per language
Fill in one field for each target language to set the exact translation.
4
Add context if the term is ambiguous
Use the context field to clarify meaning, such as “audio product category” versus “computer mouse.”
Edit many terms at once
Click Bulk edit to switch to a text editor for adding or changing several terms together. The format is:| keep-as-is after a term to keep it untranslated.
Import a dictionary file
You can load terms from a file instead of typing them. Before anything changes, WISEPIM shows what it found: how many terms are new, how many update existing entries (translations merged), and that invalid rows will be skipped. The confirmation reads “New terms are added and translations on matching terms are merged. Existing translations not included in the file stay unchanged.” Click Import dictionary to apply.Delete several terms at once
Tick the terms you want to remove, or use Select all visible, then delete them together. A dialog titled Delete N dictionary entries? warns “This permanently deletes the N selected entries. This cannot be undone.” Confirm with Delete N entries.Let the dictionary build itself
Turn on Auto-learn glossary from reviews and WISEPIM grows the dictionary for you. When a Linguistic Review finds a wording inconsistency it is highly confident about, that finding becomes a dictionary entry, so the next translation gets it right the first time. The setting is off by default. Turn it on once your first reviews look sensible.Auto-learned entries never overwrite your work. Terms you added yourself, and anything marked Keep as-is, always win.
Turn reviewer feedback into settings
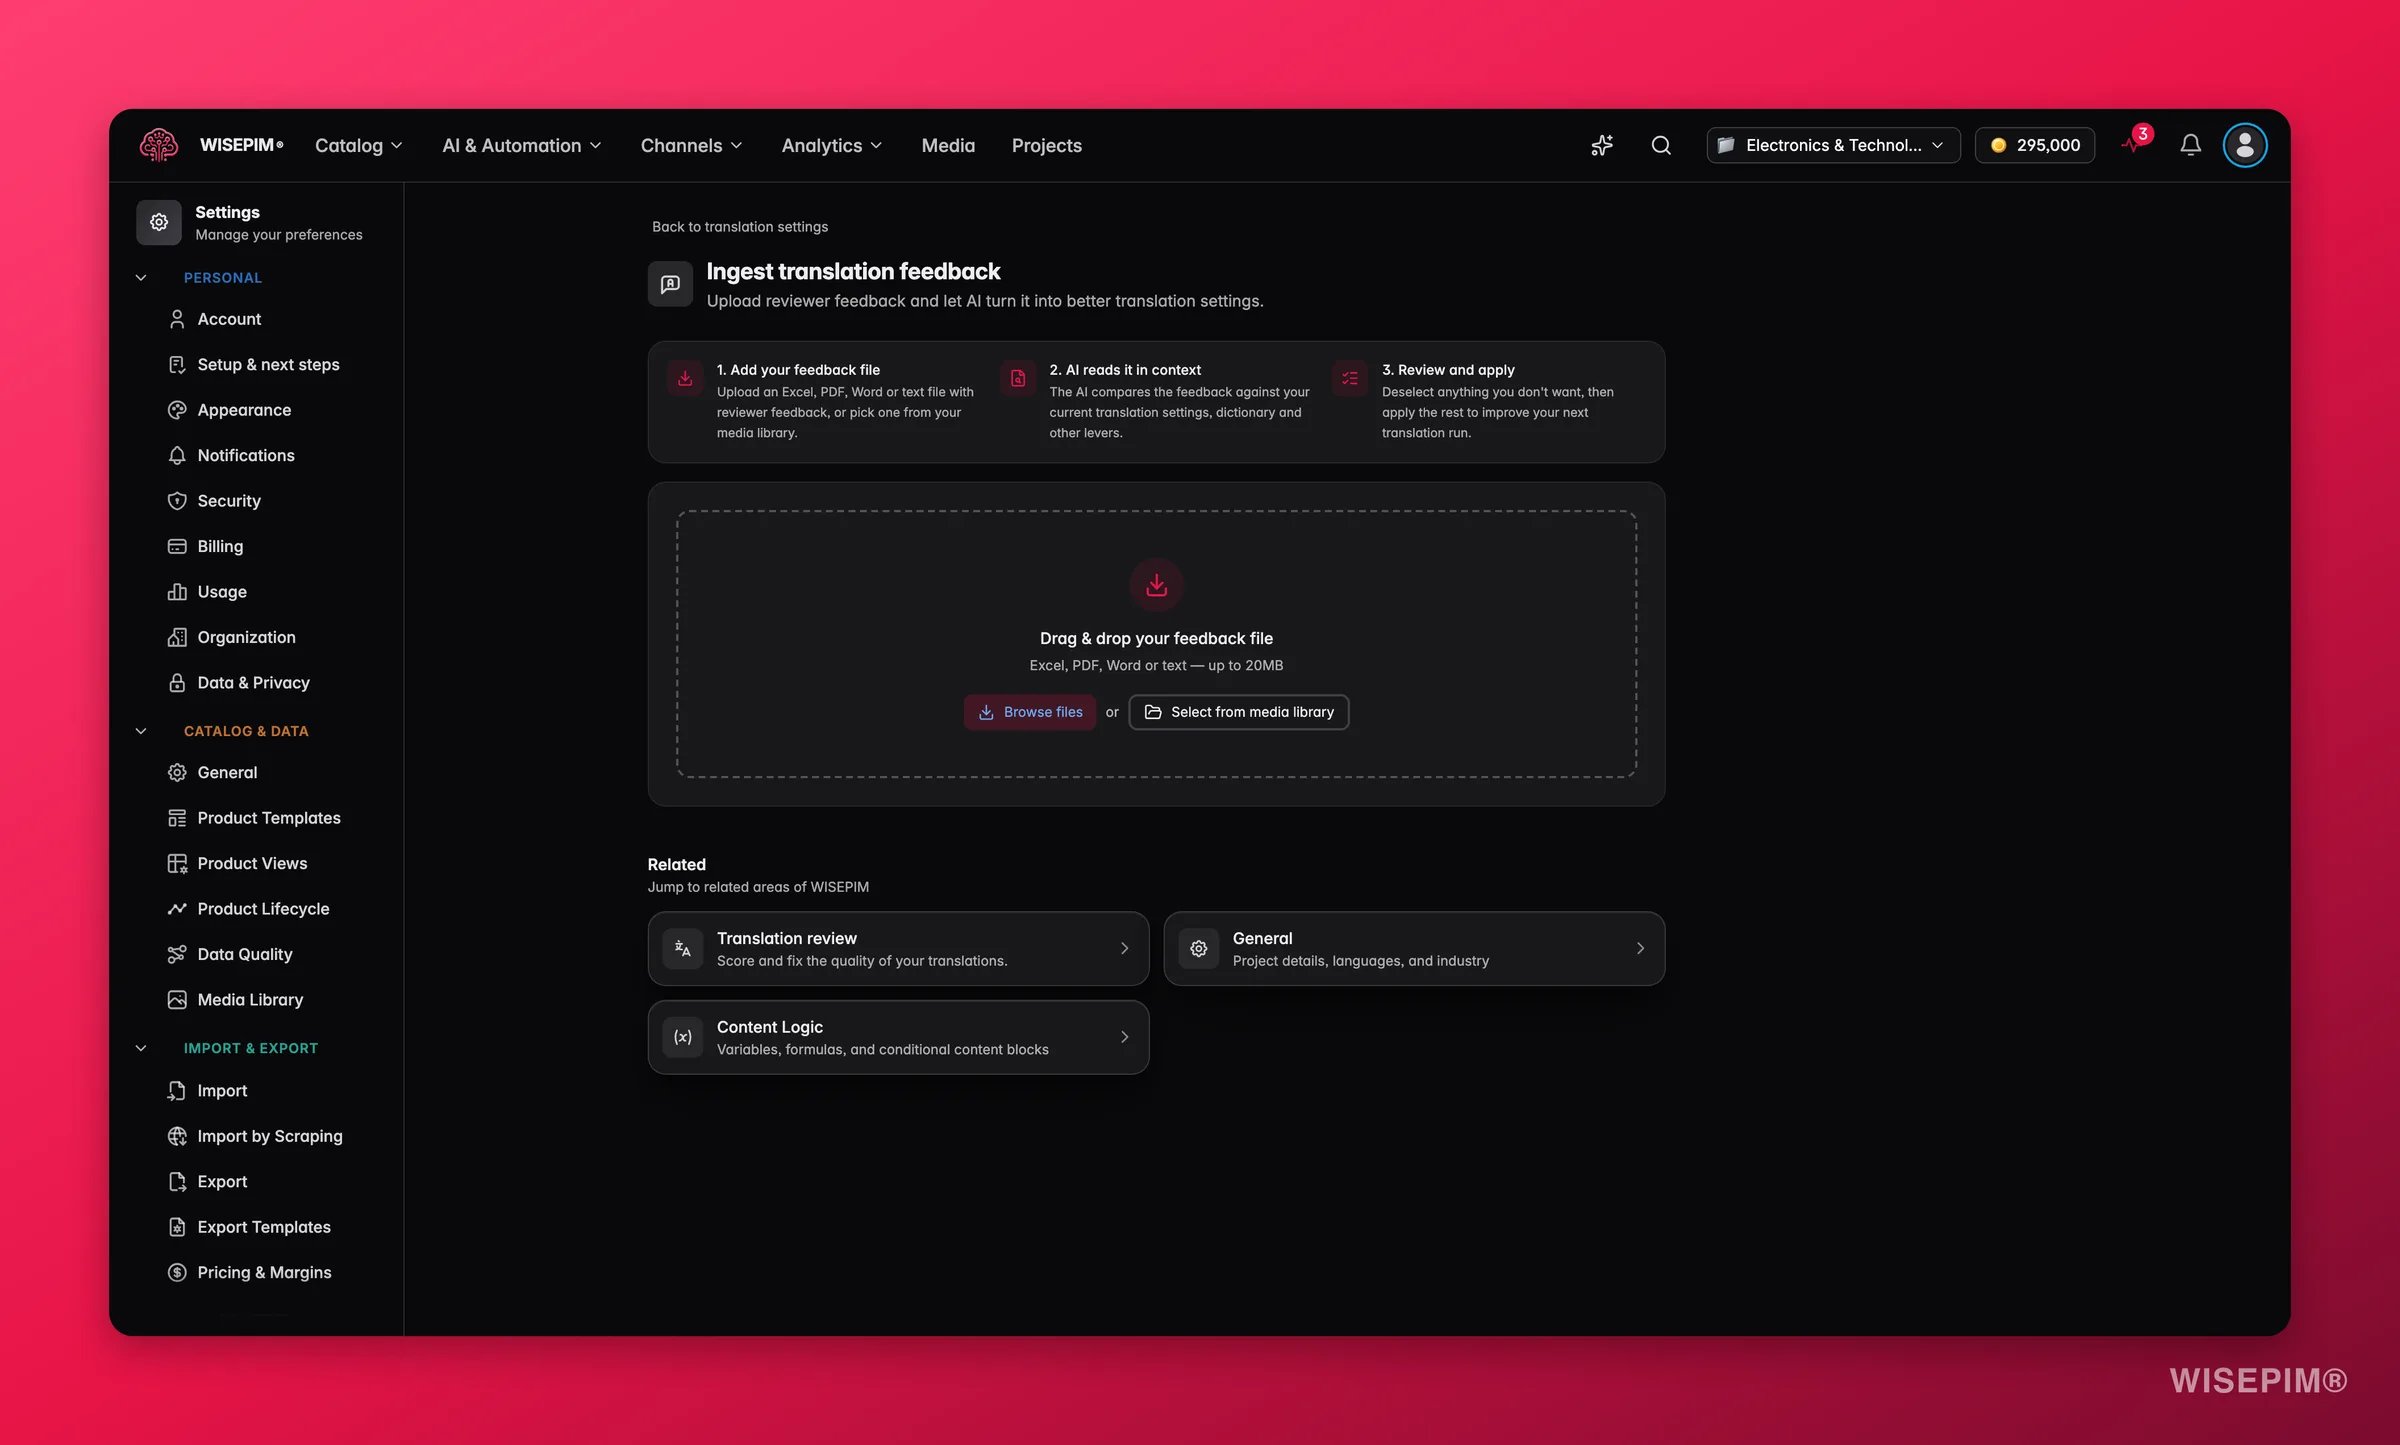
1
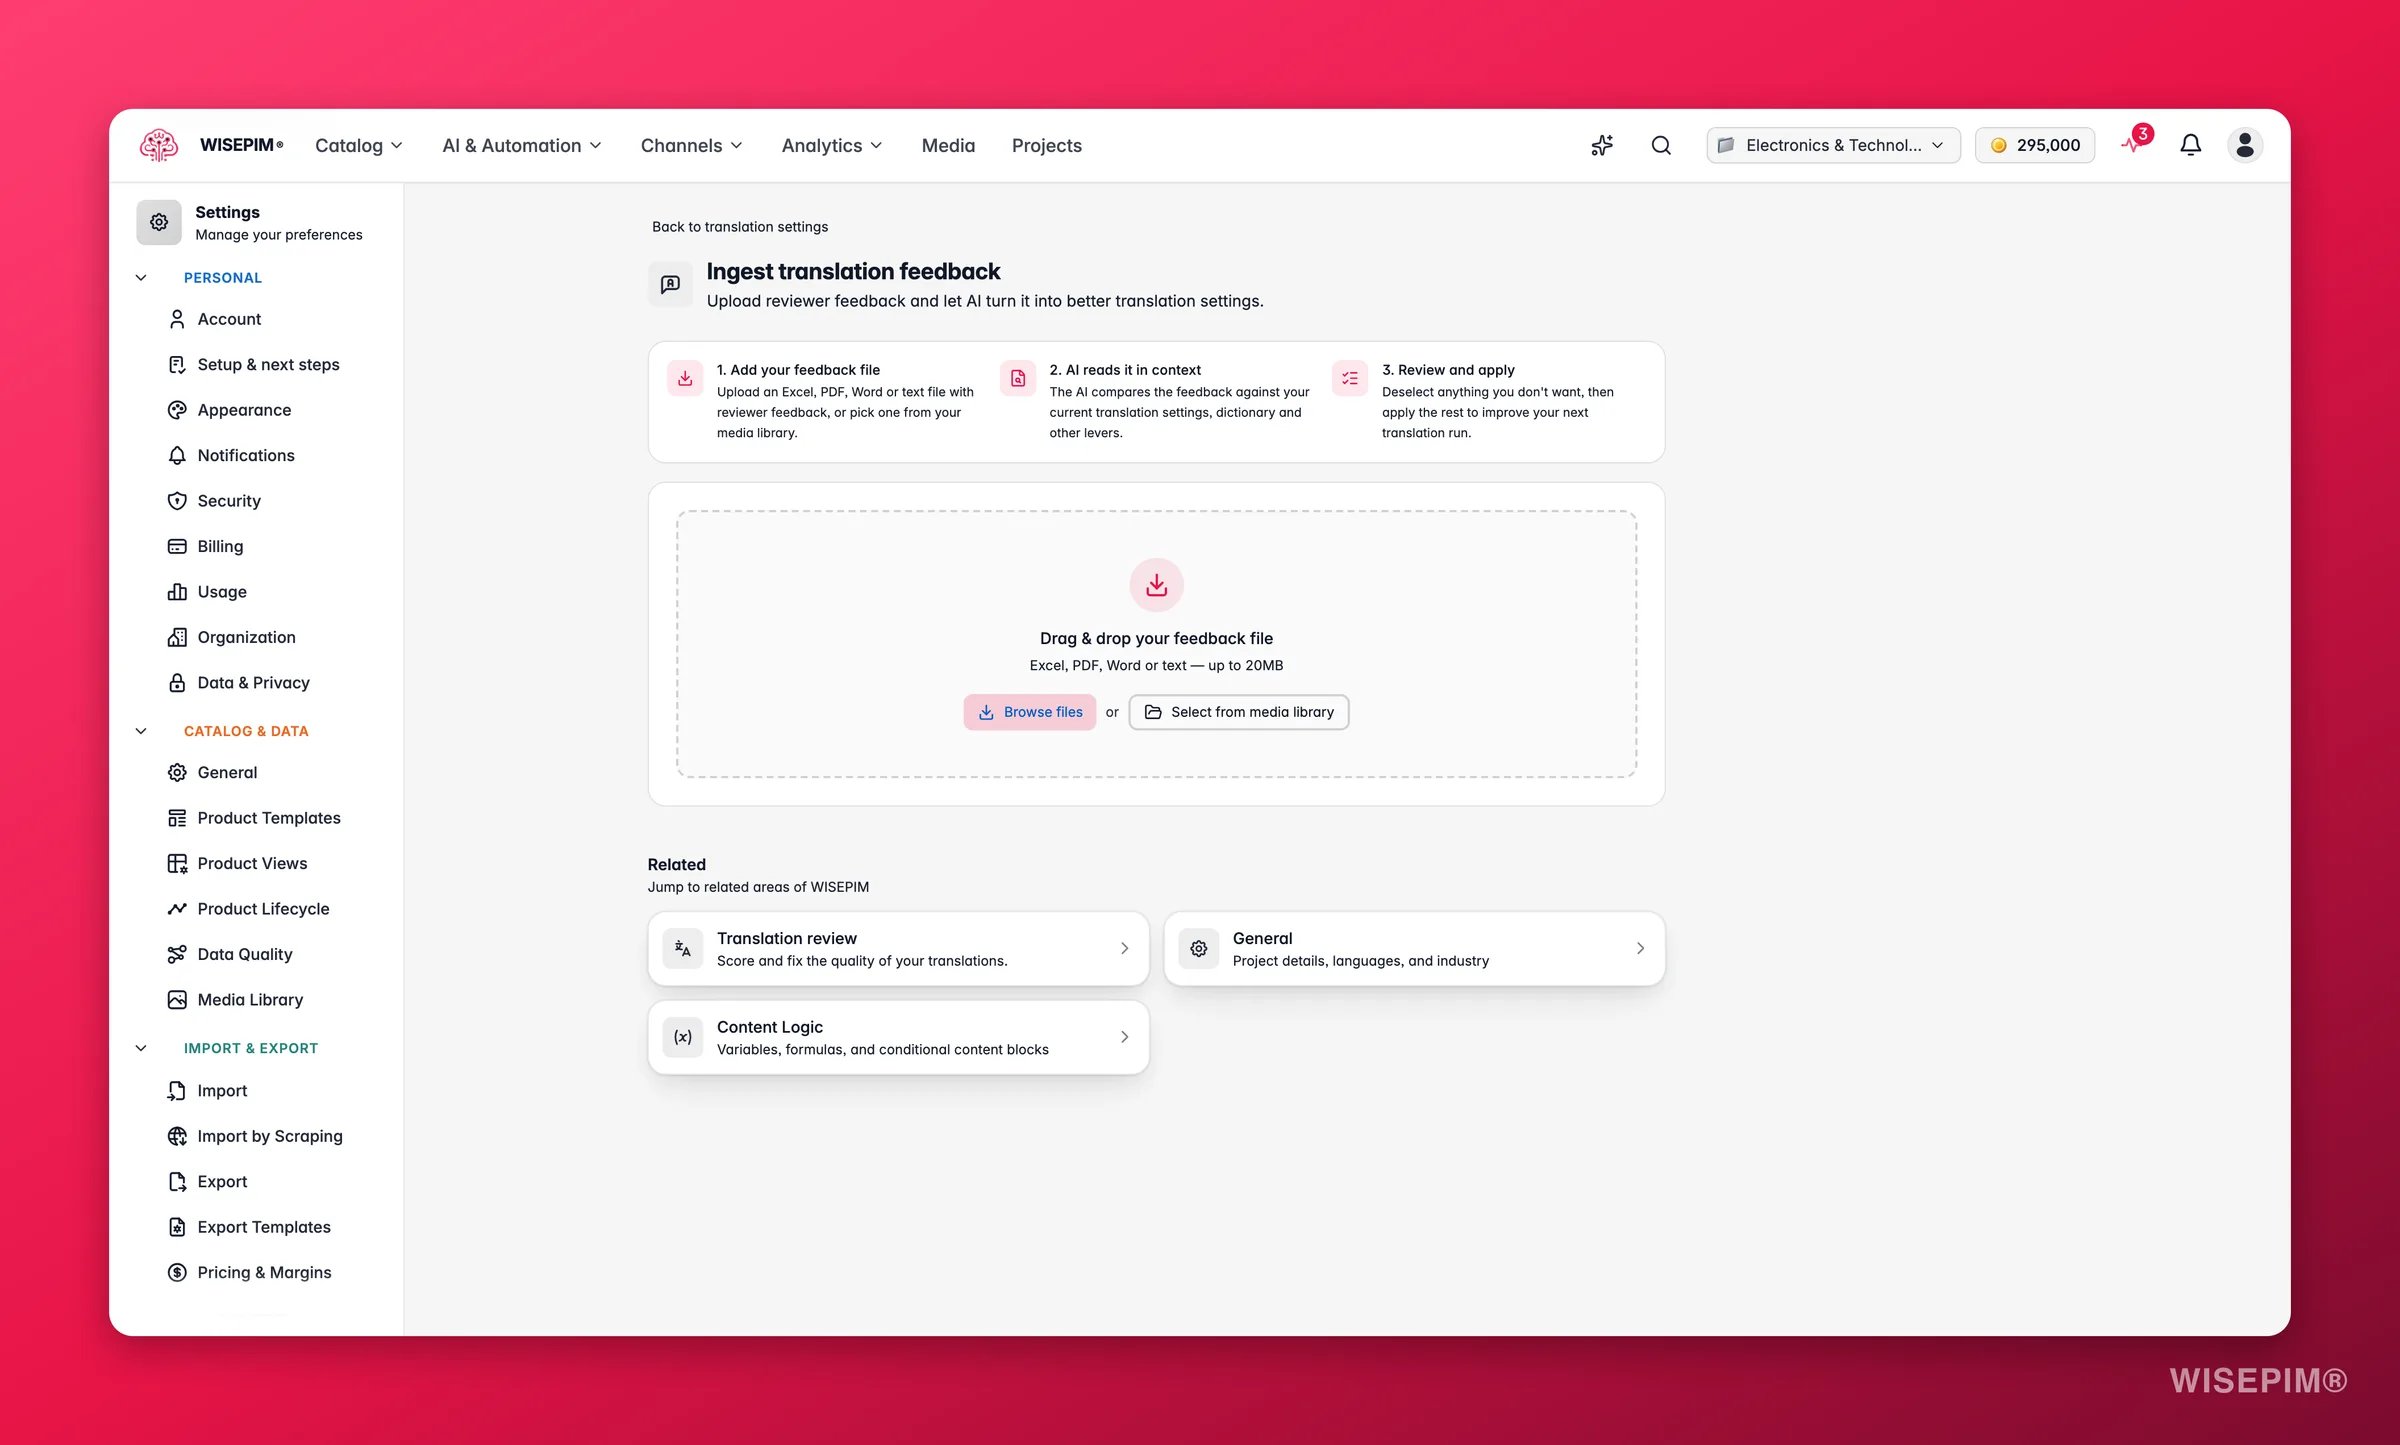
Add your feedback file
Drag in an Excel, PDF, Word, or text file (up to 20MB), or pick one from your media library.
2
AI reads it in context
Click Analyze feedback. The AI compares the feedback against your current translation settings, dictionary, and other levers. The analysis runs in the background, so you can leave the page and come back later.
3
Review the suggestions
You get a list of suggested changes, split into three groups. Everything starts selected; deselect anything you don’t want.
4
Apply
Click Apply changes. The selected changes land in your translation settings and are used on the next translation run.
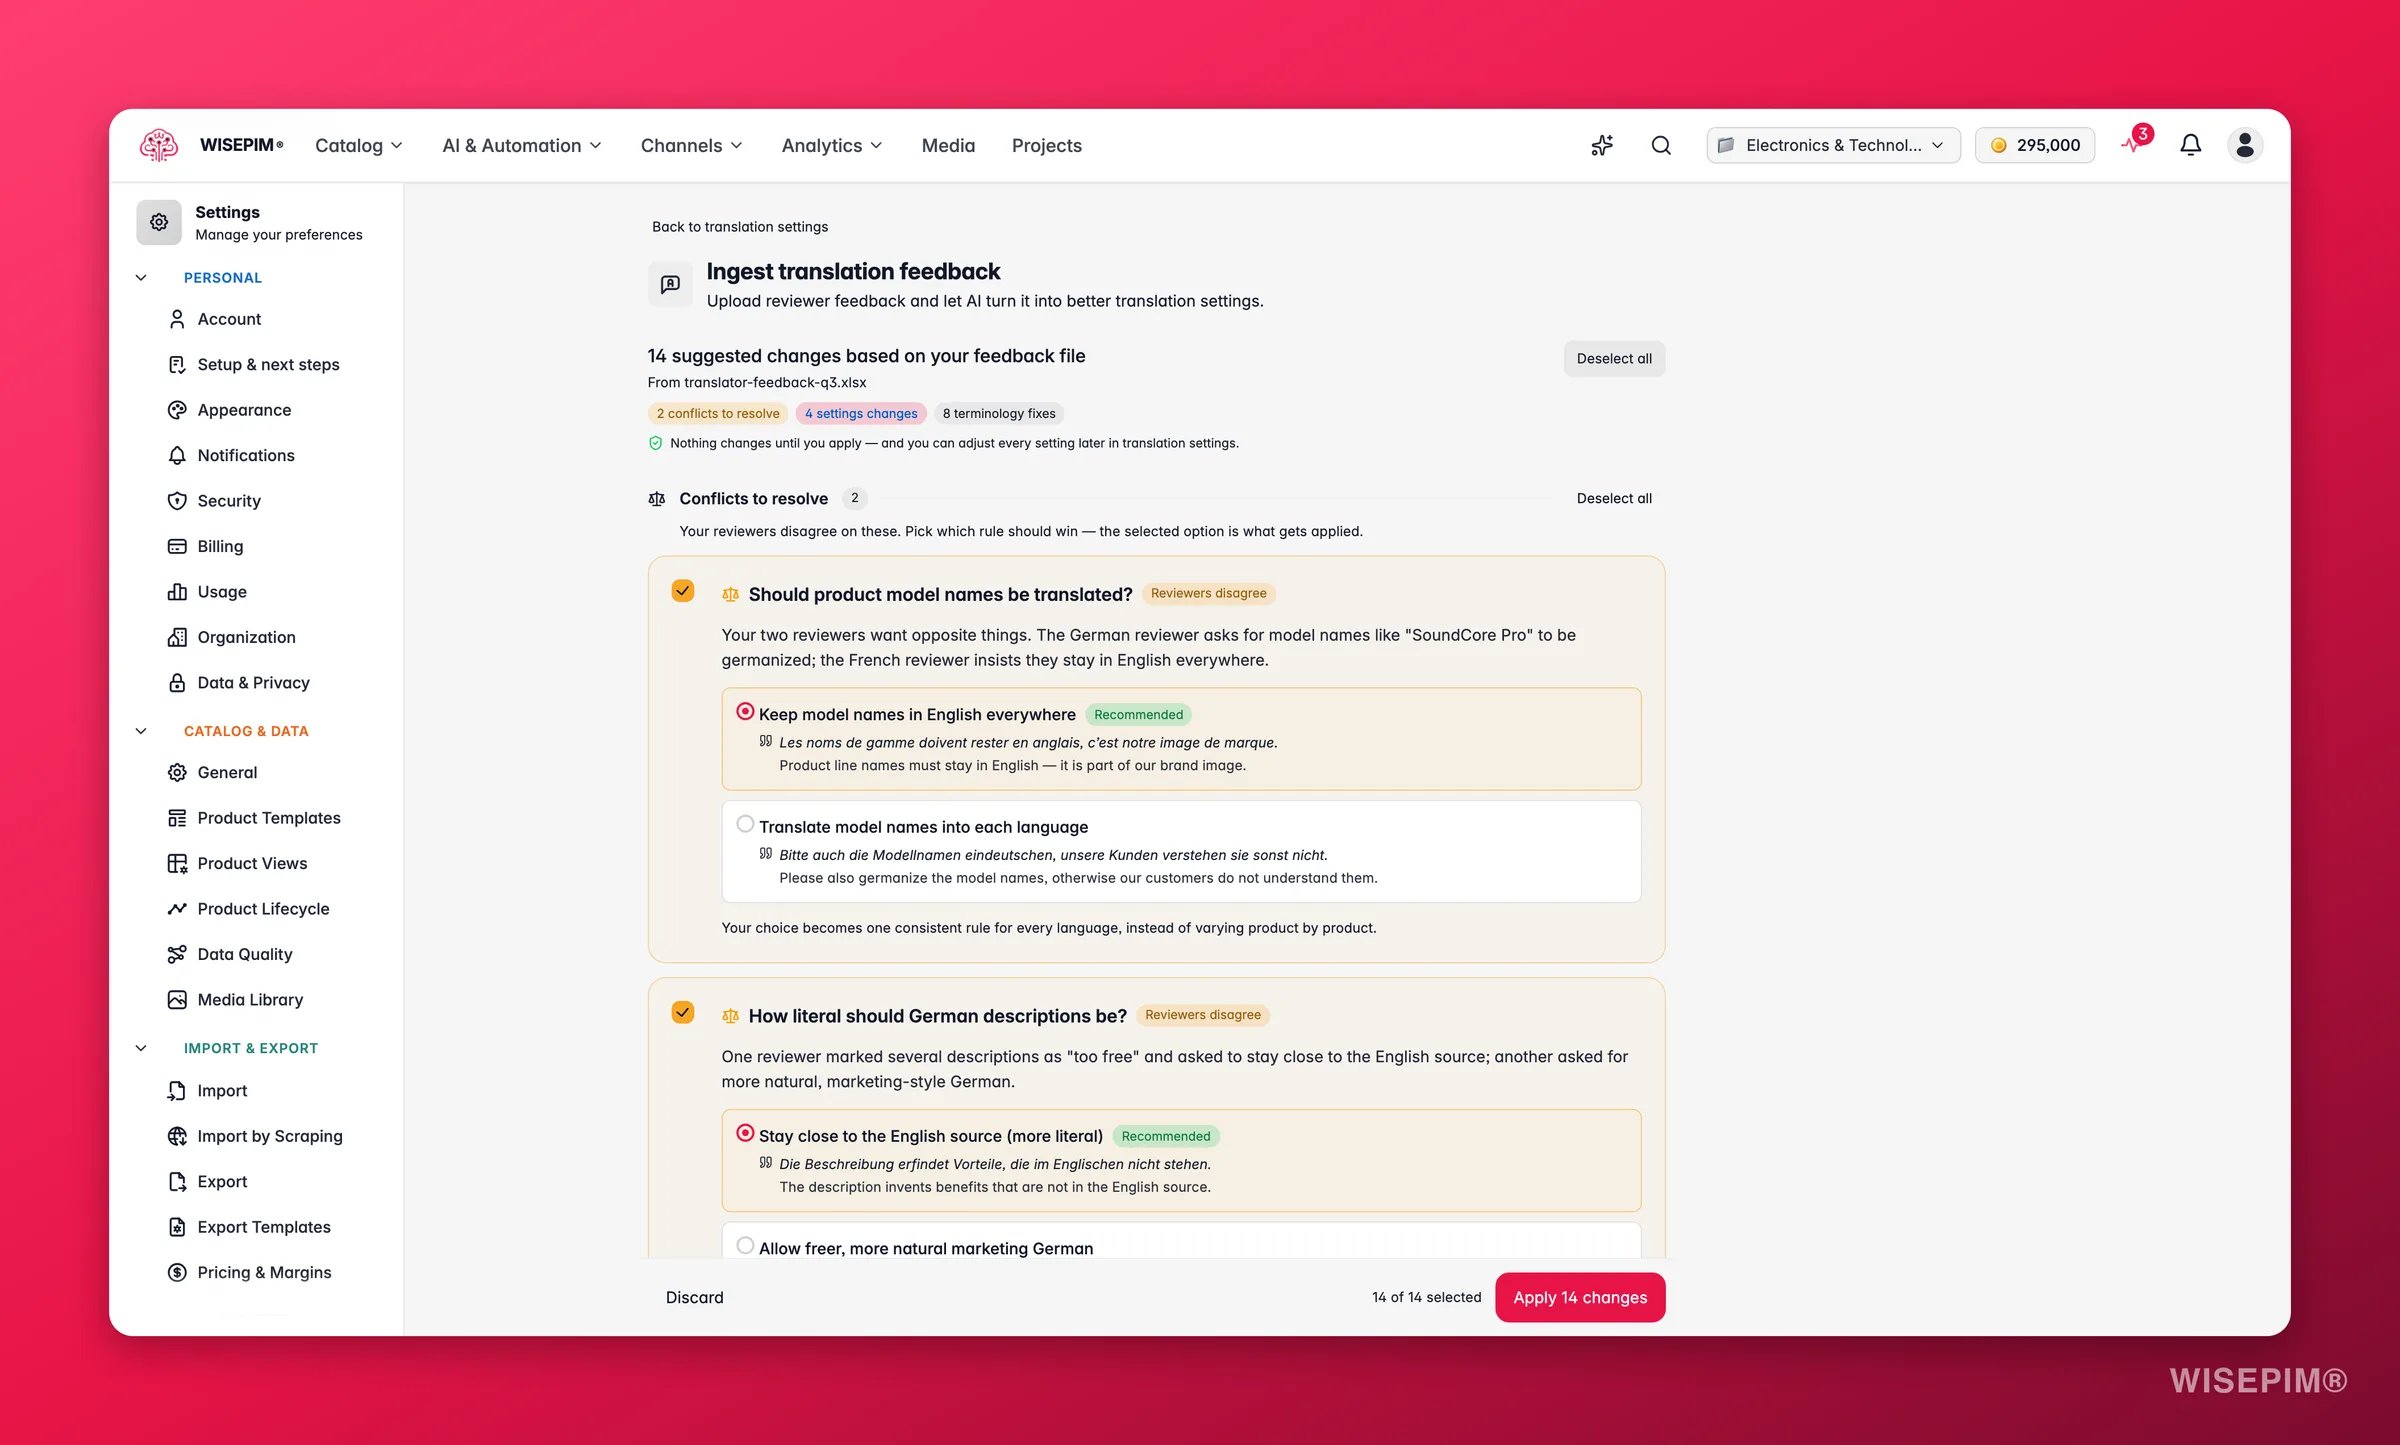
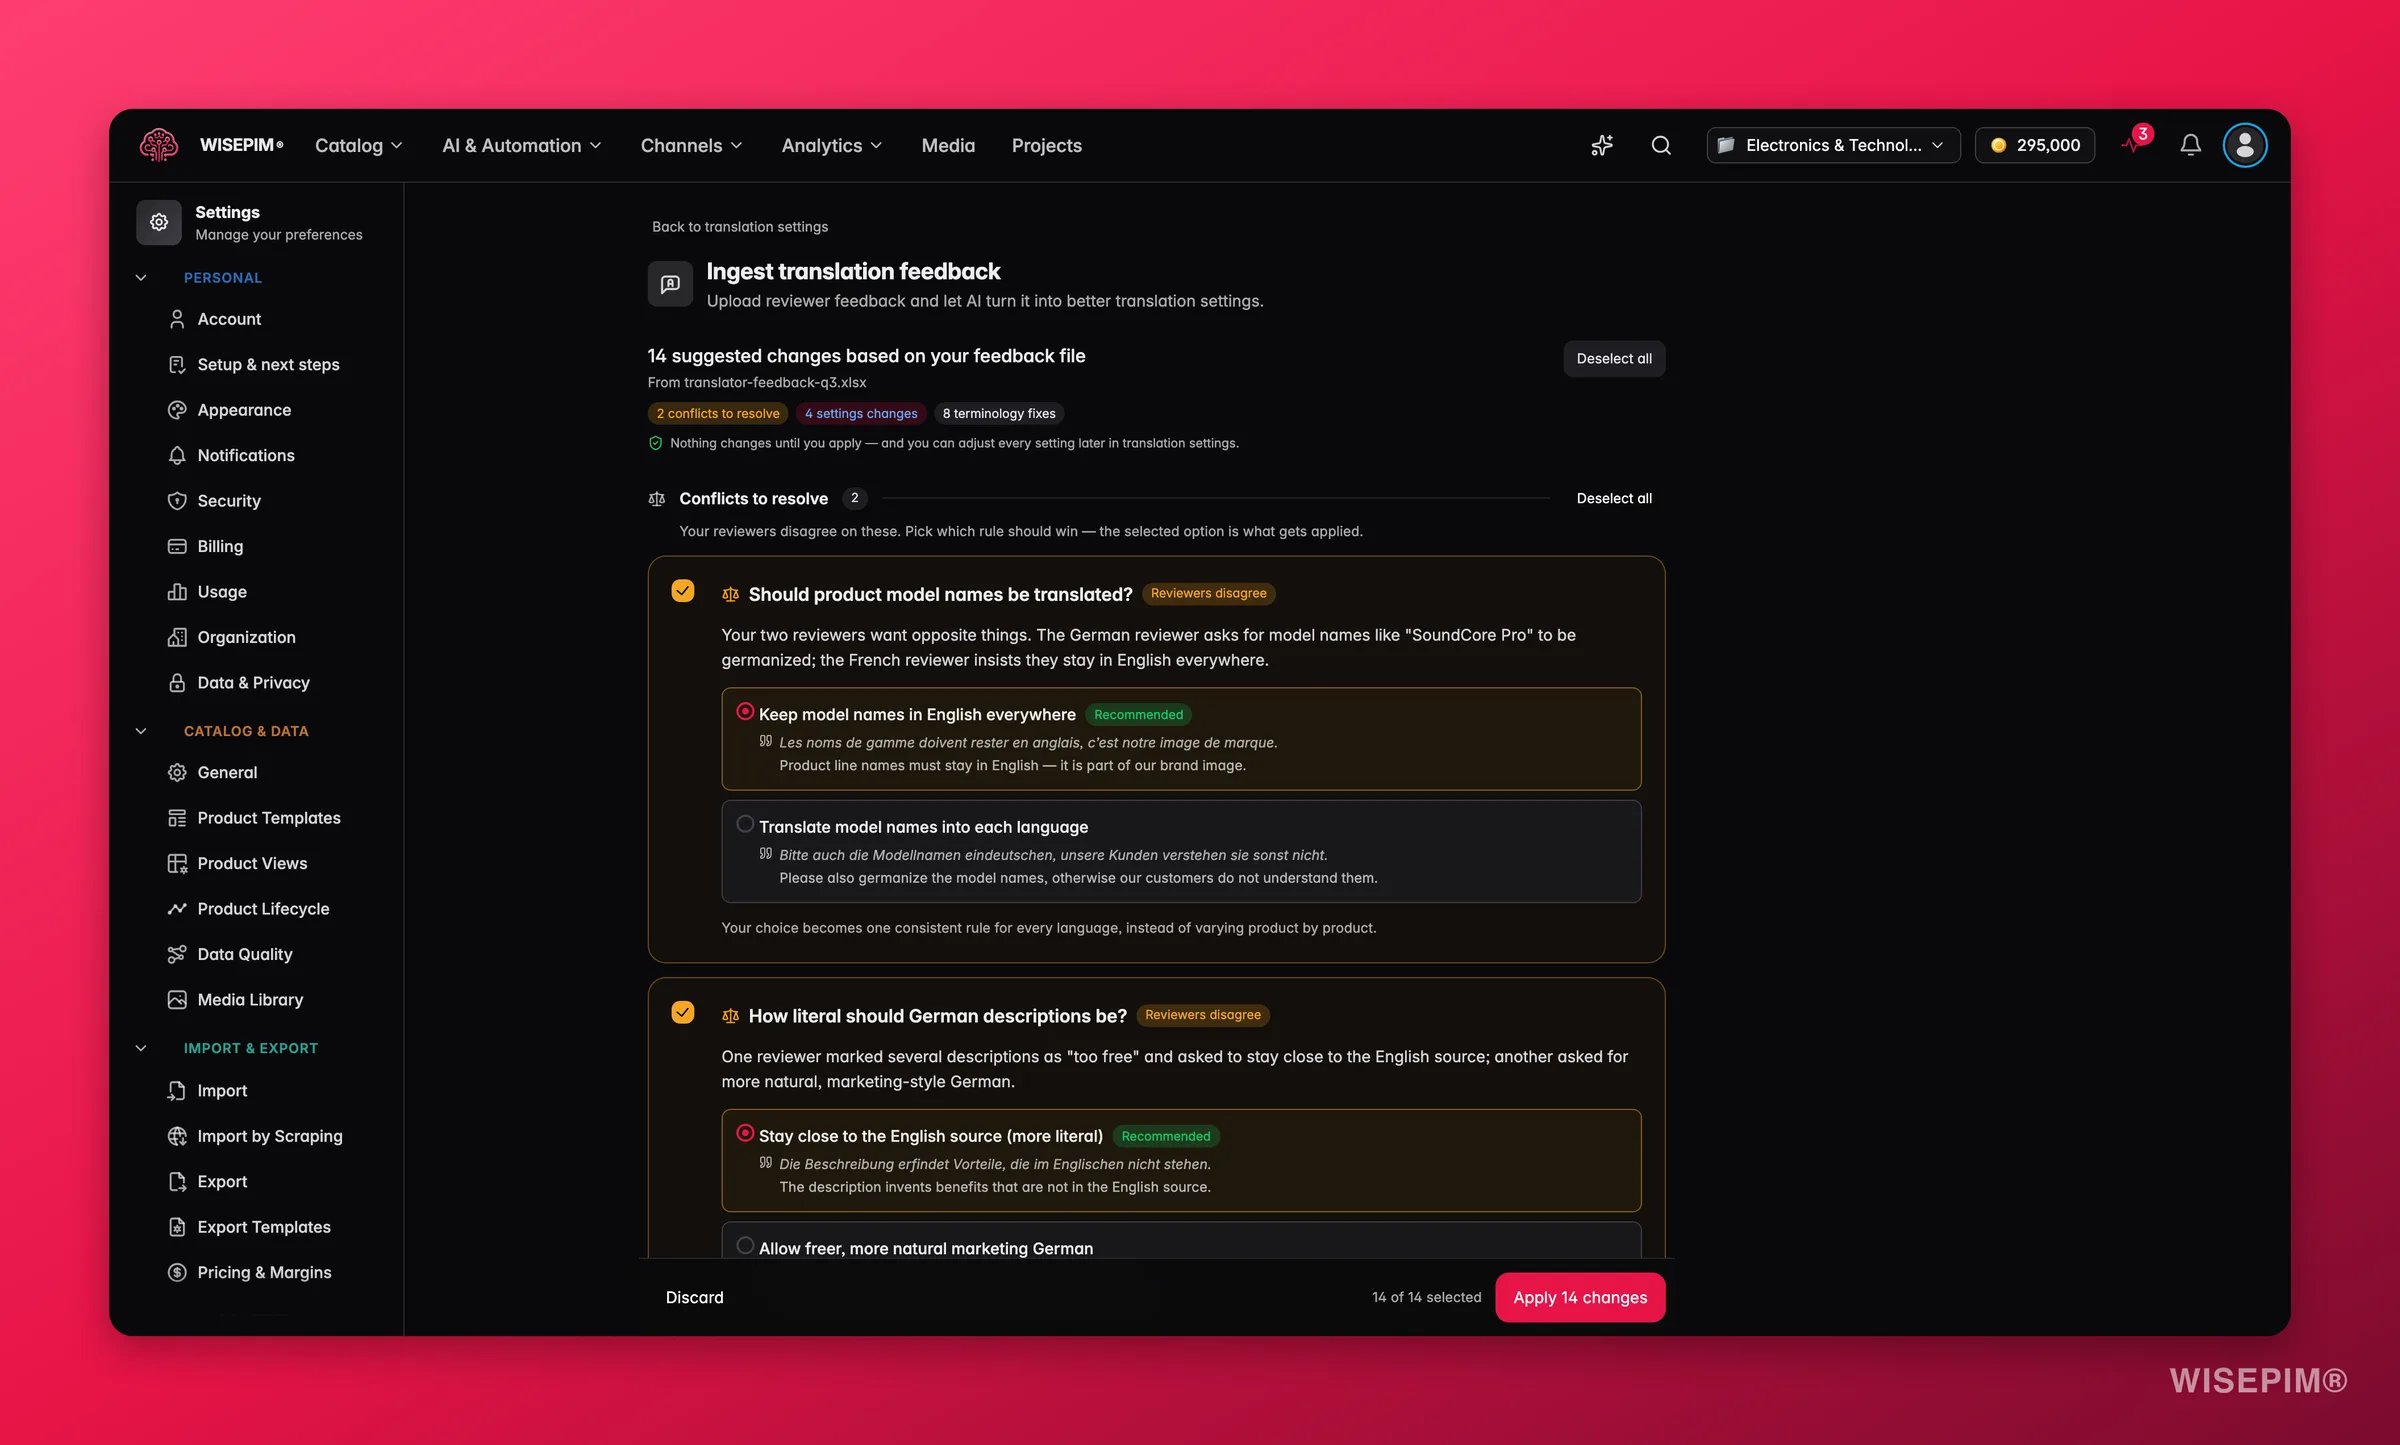
- Conflicts to resolve: your reviewers disagree on these - for example, one wants product names kept in English while another wants them translated. Each conflict shows the positions with the quoted evidence from the file, and you pick which rule wins. WISEPIM marks the option it recommends.
- Settings changes: adjustments to how the AI translates, based on recurring feedback. Every card shows what changes (current → proposed), what it improves, and the evidence from your feedback file, with a priority so you can see what matters most.
- Terminology: corrected term pairs per language, with how often reviewers raised each one. Applied terms are added to your dictionary, so every future translation uses the approved wording.
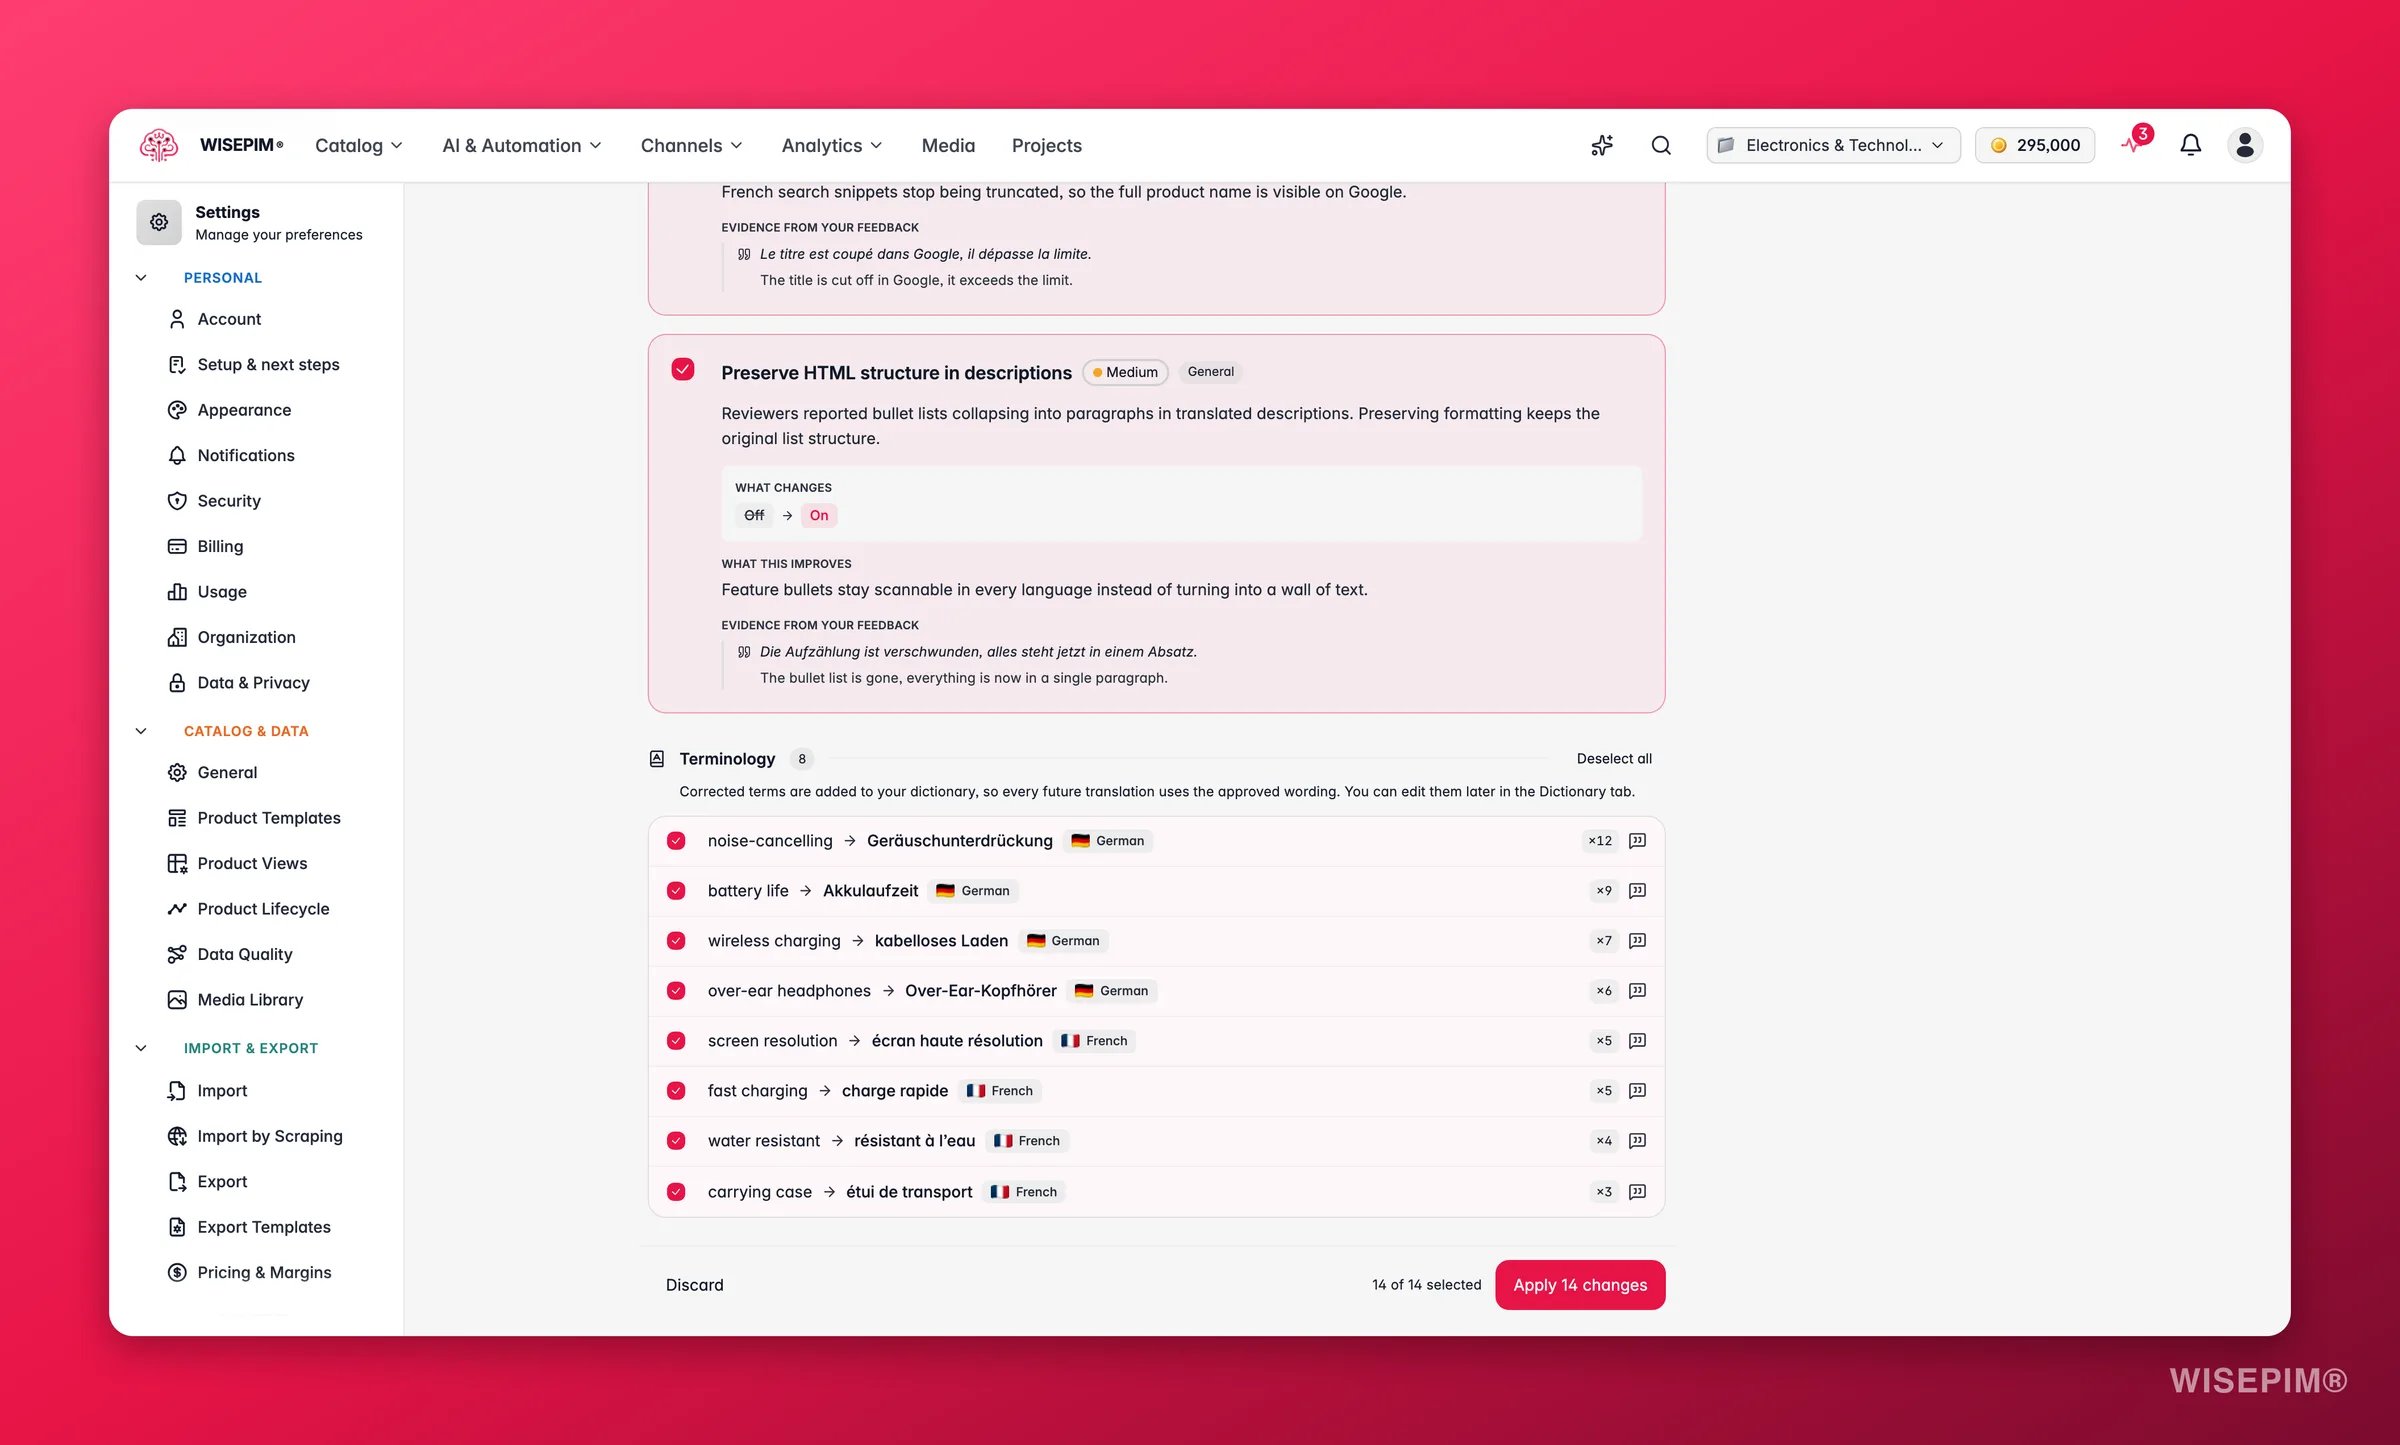
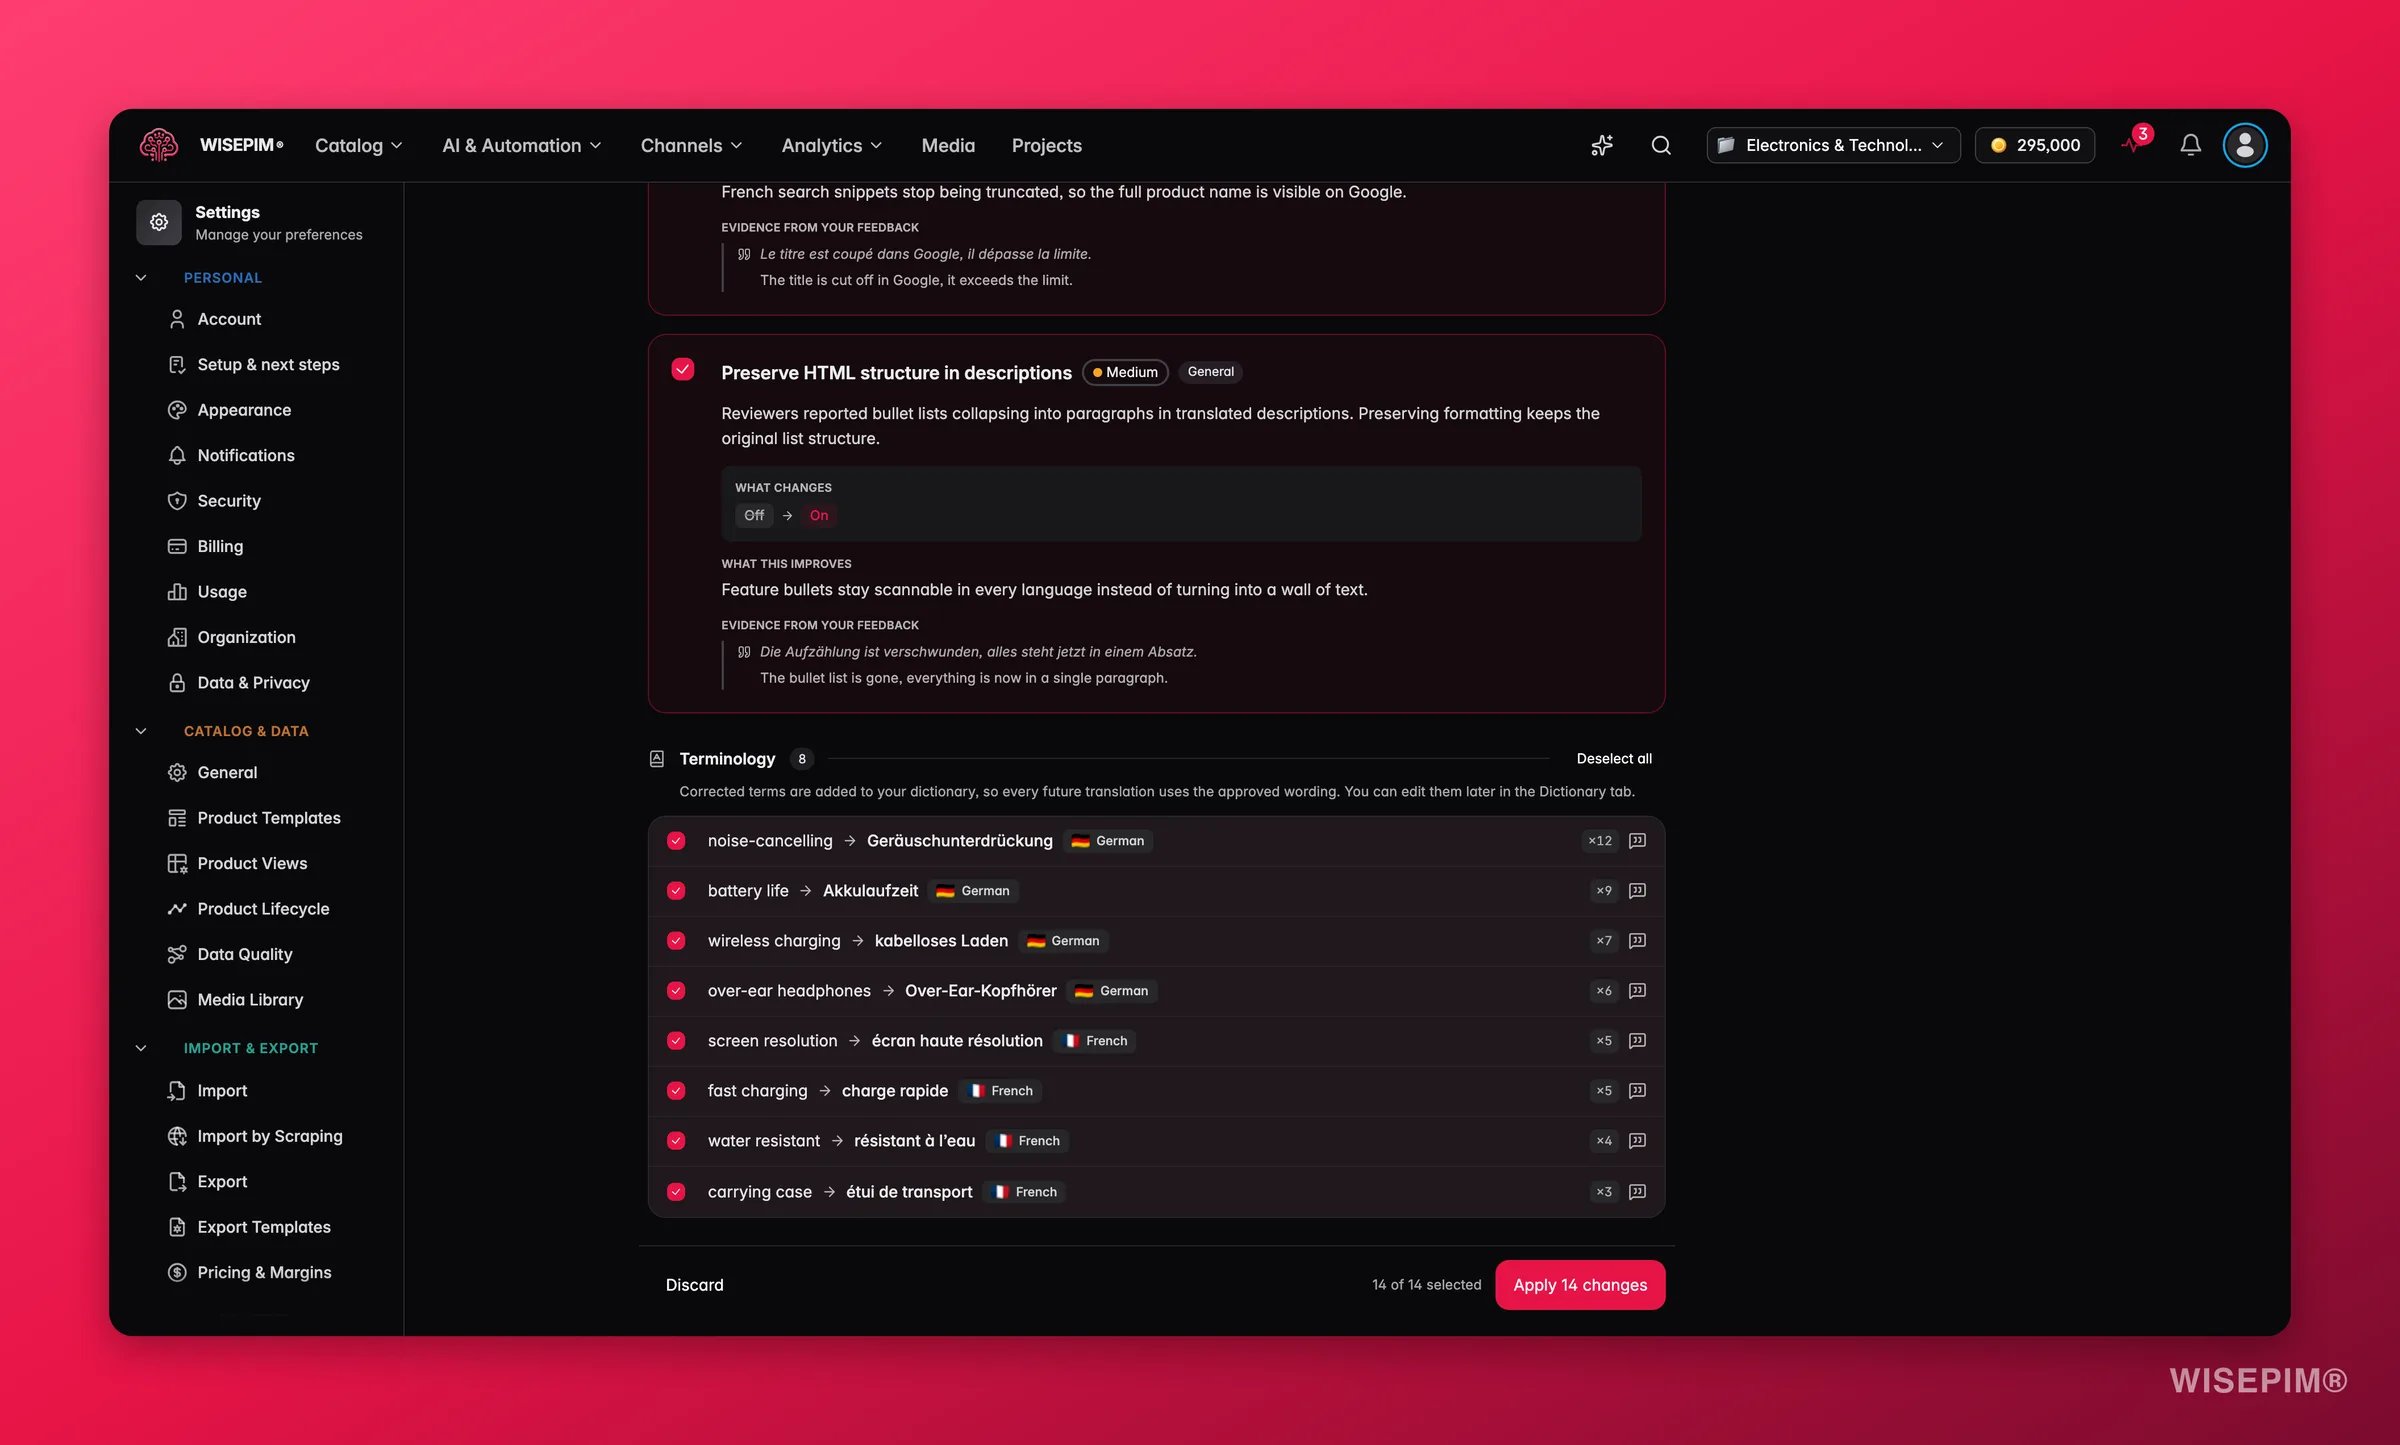
Nothing changes until you apply, and you can adjust every setting later on this page. After you apply, your next translation quality review checks each change against the actual product texts and reports whether the feedback was really applied.
Save your changes
When you change any setting, a save bar appears at the bottom:- Save changes: saves your translation settings to the project.
- Reset: discards all changes since your last save.
Related
Translating Products
Translate your catalog in bulk using these settings.
Languages
Add or manage the locales in your project.
Prompt Library
Reuse saved instructions across AI tasks.